
Simplicity is ultimately a matter of focus.
–Ann Voskamp, One Thousand Gifts
In the complex world we live in, the concept of “simplicity” may seem foreign and sometimes even feel impossible. It is not. Finding, practicing and maintaining “simple” does, however, take effort. And, that effort requires focus, intentionality and persistence.
SIMILAR YET DIFFERENT
As I began thinking about the idea of simplicity and the act of simplifying, I realized that they were similar yet different. Also, both are easily connected to photography and life in general.
Simplicity is the state of being simple, uncomplicated or uncompounded. In photography this can lean toward minimalism, which emphasizes sparseness and focuses on having the least number of elements in the frame. To simplify is to make something simpler or easier to do or to understand. This means reducing the elements down to only what is necessary to “tell the story.” This can mean fewer objects in the frame, but, more importantly, the removal of distractions.
Simplification and simplicity (and minimalism) are not necessarily the same thing. They do, however, share the common path of leading toward greater clarity and understanding in many spaces – from a single image to a single room or a single scene. The goal is to remove all that distracts our attention so that we might present a clear picture – one that communicates what we want to share.

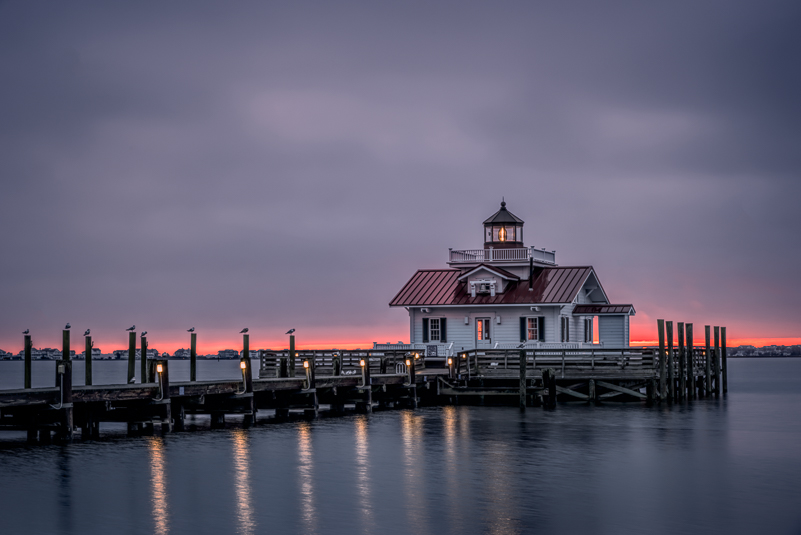
A simple scene created with camera movement left to right on a tripod after a “dud” sunrise in the Outer Banks.
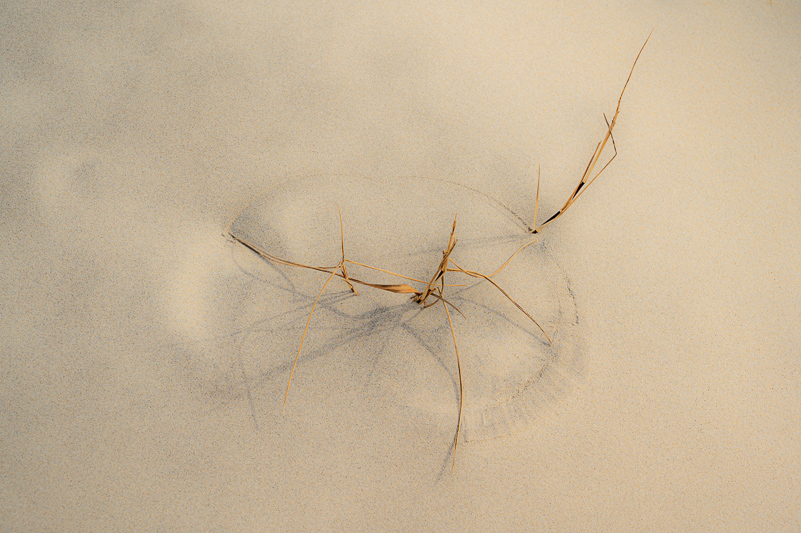
A simple story of sand and wind and dune grasses.
RESISTING DISTRACTIONS
When I think about the concept of simplicity, certain words that come to mind include stillness, calm, peaceful, uncomplicated and uncluttered. Some are emotional, others are visual. My life on a daily basis is not represented or defined by these words, though at times it offers up some moments of time when they ring true. Keeping things simple is not easy, at least for me (a non-minimalist in nature). There are far too many distractions in our everyday lives that pull our attention (and actions) in different directions at once – away from the stillness, the simplicity and the quiet. We all know what they are . . . whether devices of all kinds or the almighty to-do lists. We must choose to pull away from them and resist our “Pavlov-like” reactions to them. To create a sense of calm and simplicity, we must be mindful in our choices and stop the knee-jerk jumping every time a notification sounds the alarm. Quiet time, whenever you choose to take it, should be a priority. Conversations and time with family and friends deserve our uninterrupted attention and focus. Not everything is urgent, and most things can wait.
ADDRESSING THE CHAOS
Another aspect of simplicity that applies in life and photography is the idea of “uncluttered” and “uncomplicated.” I don’t know about you, but my office, specifically, does not present an uncluttered aura. Quite the opposite (as only a rare few can attest). It is in need of focus and attention. My tendency to collect “stuff” does not help. The clutter can and does at times make it difficult to stay focused, as I get distracted in burst of effort to address it while in the middle of something else. What I know is that as the distractions and clutter are reduced, I feel better and work more efficiently. My method of attacking the challenge is somewhat organized. It involves a timer set in 15-minute increments. I choose a smaller area (subject), set the timer for 15 minutes and get to work. At each interval I can choose to continue working or break (each time for 15 minutes) until the task is completed. It is intentional, takes work and practice . . . and persistence. Not easy, but it makes a way for more calm, more clarity and simplifies my life just a little.

A dune fence and curves with shadows and light.
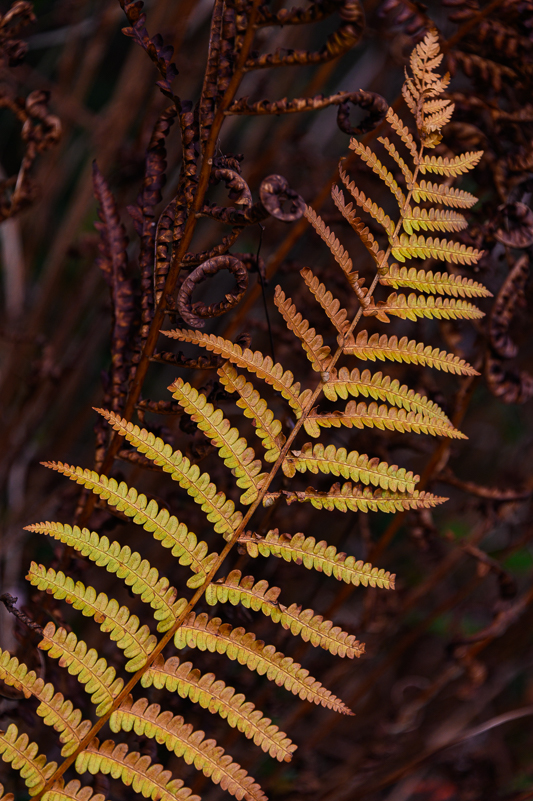
Curves and color in an autumn fern.
PRACTICAL TOOLS TO SIMPLIFY IN THE FIELD
While the 15-minute timer method works for me in my office, it’s not practical in the field when I’m out photographing. The practice of focus, attention, intention and persistence, however, does. Call it mindfulness, slowing down, being present, or whatever you want. It works.
Do you need a timer? No, but you do need to take your time and be more deliberate. If you are one of those photographers who get out of your vehicle and immediately mounts the camera to your tripod, plops and starts shooting, please stop. You may not believe it now, but you will thank me later. Putting your camera on the tripod may make for an easier carry, but will not always help you get your best images. Why? Because you’ve already made choices before even assessing the situation or deciding what your visual goal might be. Consider some of the following techniques as alternatives.
BEFORE YOU START – STOP
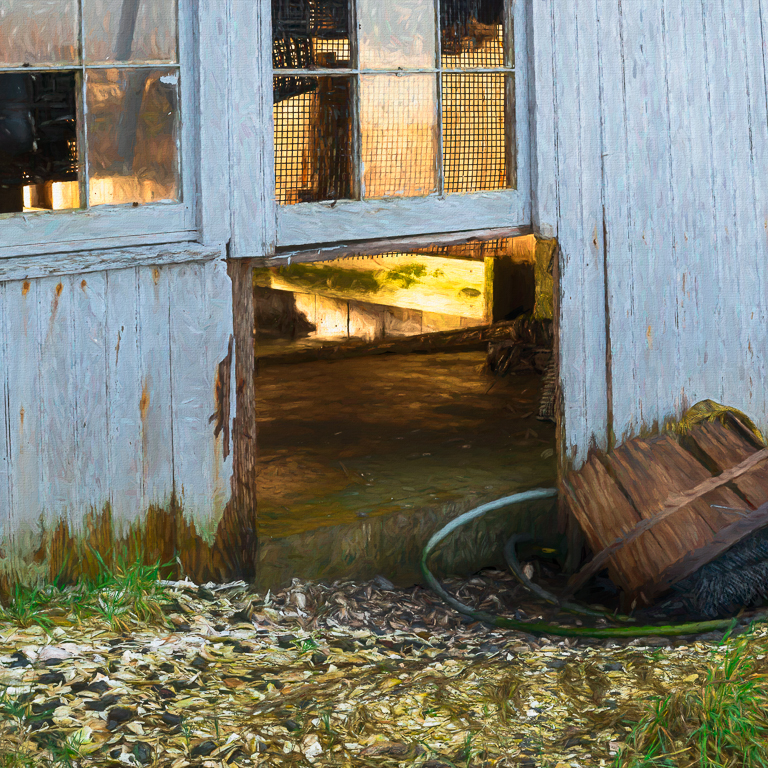
Maybe you’re visiting a place for the first time and are overwhelmed. So, you start shooting and hope that you get something good to share with others. Or maybe you’re visiting an “old friend,” a place or subject you’ve worked with many times, and you know the drill. Could that be the “same old drill” on a different day? Perhaps, with a slow down and more intentional approach, you could be surprised with something completely new, unexpected and very different from your usual output. Resisting the urge to set up shop and start shooting right away will help. Take your time. Assess the situation, the light, your mood, the possibilities. Then, decide what you need to make it happen. So, yes, stop before you start.
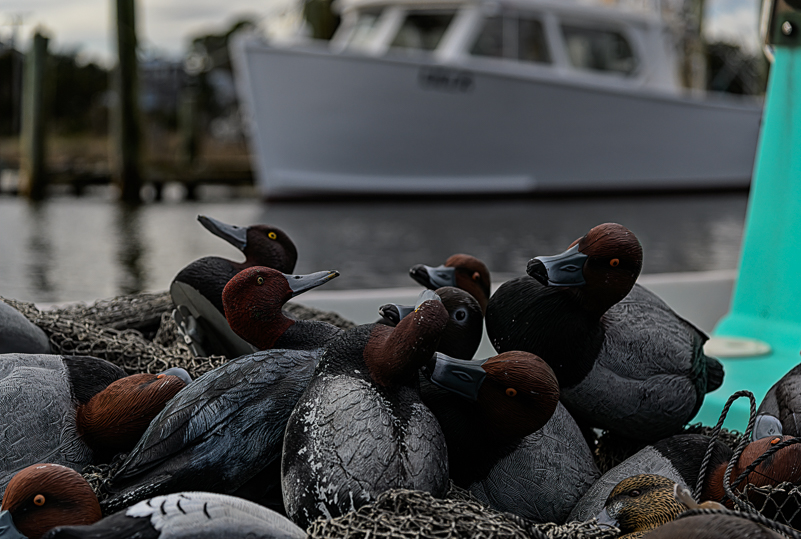
The larger story of duck decoys before breaking it down – the beginning.

Moving in closer to the duck decoys to simplify the scene.

Turns out that a single duck decoy and some netting tells the larger story differently, but just as well.
FIND AND DEFINE
When you are out in the field, look at your surroundings, find your subject, and look more closely. Define your subject and your objective. Where’s the best place to stand or kneel or even lay on the ground? What’s the best angle? What lens do you need? What’s the light doing for or against your subject? It doesn’t have to take a long time, but it does require deliberate thought.
I usually find my subject and best position before ever bringing the tripod into the equation. I want those three legs to work for and with me, not fight it or let it steer my composition. Do I raise my camera to my eyes and peer through the viewfinder? Yes, but not with it attached to the tripod.
When you define your subject (say it out loud if it helps), it is easier to use the tools you have to simplify your composition and create stronger images. I have a few questions you might use to clarify important elements in the frame. First, “Who’s the STAR?” There’s always something playing the lead. Second, “Who are the supporting characters?” Anyone or anything that is not doing the job of supporting the star needs to get the hook and be pulled off stage and out of your image. In other words, look for and remove all distractions. Clean up messes everywhere they exist, including in the backgrounds.

Who’s the STAR here? I spent a lot of time working this mushroom from the larger scene in the forest to the simpler scene on the log. A shallow enough depth of field and selective focus gave me what I was looking for. That, and an eye-level perspective.
COMPOSITION TOOLS AT OUR FINGERTIPS
Remember, whatever you put in the box is what the viewer sees. They don’t know anything about what you really saw or felt or were excited about unless you clarify the elements AKA simplify. Too much stuff or not enough will muddy the message, and it will be lost.
Arrange the elements with purpose. Whatever the subject or story is, make it clear – in the camera, in the field. Please stop yourself from saying, “I’ll crop it later.” It’s an excuse to move on and is a bit lazy, especially when you have time and you can do it while you are on location and in the moment. To be clear, I’m not against cropping. I crop, too. However, I will do all I can do in the field first. I hear way too often how having the MEGA megapixels makes it easy to crop later. Fine, but don’t sell yourself or your images short with that perspective. Work the scene and work it all out as much as you can in the moment.
Even with a million megapixels, if you don’t “put it in the box,” it’s not there. Remember, there’s no such thing as “reverse cropping.” Too tight is too tight. Gone is gone, unless you’re super talented in Photoshop or want to spend time adding back things that you didn’t include in the frame. And, no, that’s also not an excuse to shoot wide and crop later. It’s a reminder to pay attention . . . and we all lose focus at times.

You know what? I’d like MORE in this scene. More on the top and bottom of each float, more breathing room. I came in too tight, and this is what happened. Do I hate the image? No, but I would have preferred more float information.

While this scene is also cropped, I have everything I want and need in the image to tell the story of working on the water on the Eastern Shore.
Deal With Distractions – As you might imagine, it’s the little things that matter. And it’s the little things that can make the biggest difference. Think about it this way. Once you see a piece of white lint on a dark sweater, can you stop seeing it? Even better, once you see a dot or two or three of “sensor schmutz” in an image, can you stop seeing it? I can’t. Attention to details is important, and dealing with distractions requires your attention.
Busy Backgrounds can be problematic in that they can compete for attention or completely distract the viewer from seeing what you would want them to see. Once you’ve found your “star,” pay attention to the background. Can you simplify it with a change in aperture for shallower depth of field? Will changing your angle or position take care of it? Or changing your lens? Do whatever it takes to remove the rogue performers, the photo bombers.
Bright Lights and Dark Holes. We may know that our eyes and attention are drawn to the brightest or darkest part of the frame, but even little bright lights can be annoying buggers. Deal with them as best as possible in the field or know that you’ll need to address them in post. Sometimes the best composition for your subject is one that has distractions that are only manageable in post. Try all other options first. If they don’t work, use the best composition and take care of the issues later.
So, you might wonder why this image is under distractions. Take a look on the top right corner. Once you see it, you can’t unsee it. Is it “fixable”? Absolutely.

This is the busy background you never want behind a tendril of bleeding hearts. As it is not in my garden, I had to find another one with a cleaner background.

While I would have preferred a lovely, soft background for this bleeding heart tendril, the gray, stone wall had to do on this occasion.
Sweep Your Edges. That’s a phrase I’ve heard from way back in the film days, and it still applies. What does that mean? Look through the viewfinder and look for things around the borders of your images that are distracting. The “pokemen” are those things that are sticking into the frame out of nowhere. If you can compose them out by reframing, do it. If not, know that you will have to deal with it in post. Are there elements in the frame that are not in enough (uncommitted) or that are just too heavy in the frame for the scene? Deal with them. Pay attention to how their presence or absence changes the look and feel of the image. Little changes can make big differences.
The reason this image is square and why the entire basket is not included is to remove distractions. Beyond the basket was messy and even more “rustic,” in a way that I didn’t want it in the image.

On this infrared Edsel image from Old Car City, I might like to make the light portion on the bottom left side “disappear”.
Movement and Flow in the Frame. Typically, a bullseye composition is very static and boring. Your eye and the eyes of the viewers have nowhere to go except to the middle of the frame. Anything surrounding a bullseye subject is largely ignored. Yes, the subject may be clear, but the rest of the scene is lost. A centered subject can work, but it usually (not always) involves filling the frame and intentionally working toward symmetry.
Leading lines and curves are excellent tools for simplifying images and leading the viewer along the visual path that you intend for them to take through your image. Practice seeing and recognizing lines and curves that help tell your story and explore options in the field. Experiment with different angles until you find the flow that works.
Long exposures are slightly different, but can also be a great tool for simplifying an image. Clouds, water and other moving objects are smoothed out and softened. This helps bring attention to the stable objects in the frame and provide for more visual impact by the contrast of movement and stability. Even the technique of intentional camera movement (ICM) can simplify a busy scene and create a pleasing image.

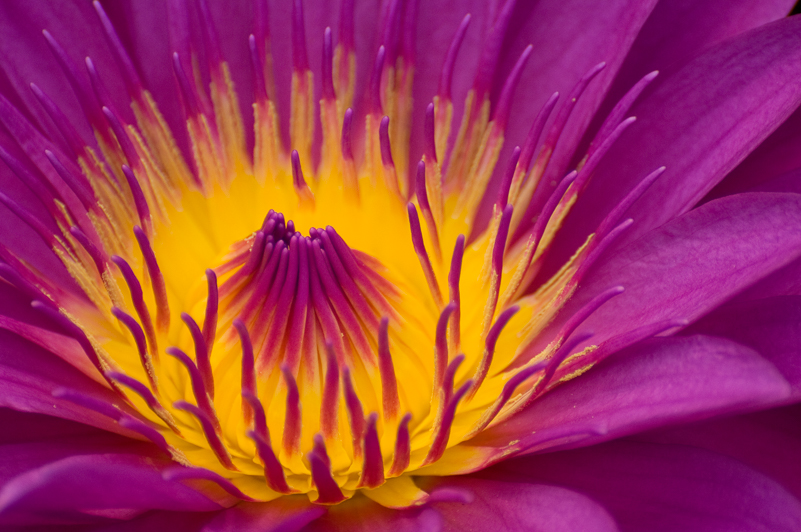
Simply about the soft color and curving flow of the petals in this bloom, nothing more.
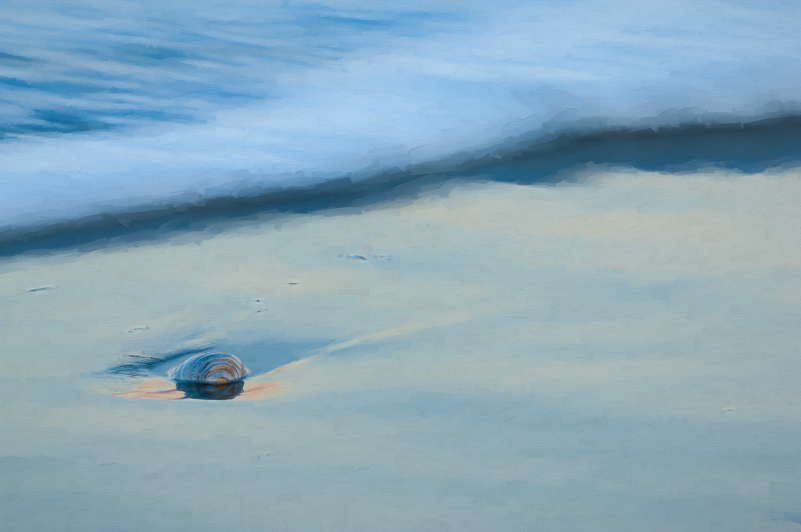
Keeping the tones consistent creates a calm and simplicity in this shoreline image.
The magic of long exposures is that it simplifies a scene. Careful attention to detail in separation of the elements adds to the success of the image.
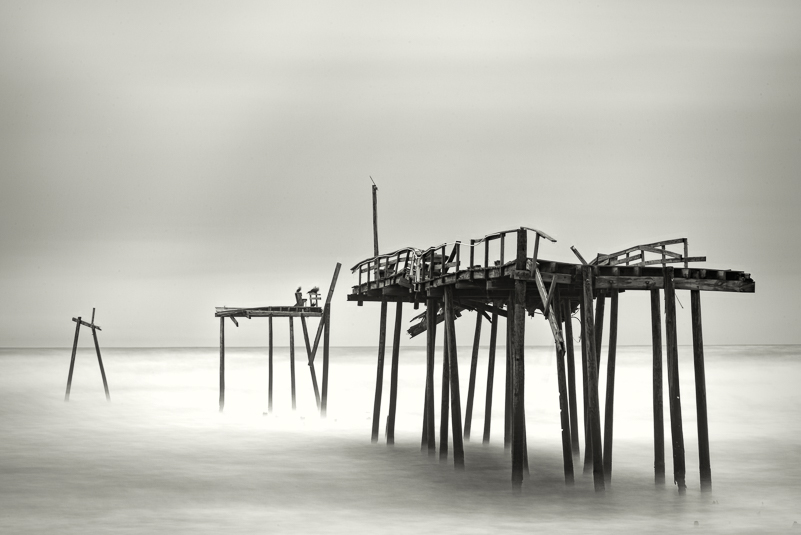
Negative Space is Not Just Empty. Negative space is referred to as the “empty” space around your subject and can be used wonderfully to simplify an image and highlight that “star” or create emotional impact. It gives breathing space around your subject. Use of negative space isolates your subject and adds meaning to the saying, “less is more.” This technique can be used powerfully to create scenes that ooze stillness and calm.

Creating negative space around them yes, six, pilings and a long exposure, along with artistic interpretation, makes for an image that feels different and better than the reality of the scene.

Simplifying a sunrise with a silhouette on the Outer Banks.
Horizons – Presence and Placement. Not every image includes or needs a horizon, even in the landscape. If your image includes a horizon line, no matter how small, please make sure it is level, preferably in the field. It matters and makes a difference. While we have many different tools for correcting “crooked,” there are times when you lose the sense of place or the feeling by leveling after the fact.
Where you choose to place the horizon in the frame also matters. This line creates a sense of what is visually or emotionally more important to you and communicates that to the viewer. If you place the horizon in the middle of the frame (dissecting it), you’re telling the viewer that you can’t decide what part is more impactful – top or bottom. The exception can be made for reflections. Using the “Rule of Thirds” is a good place to start, but it is not the only option. Decide what you want the image to say and the viewer to see. Do with the horizon what works best to match your intentions.
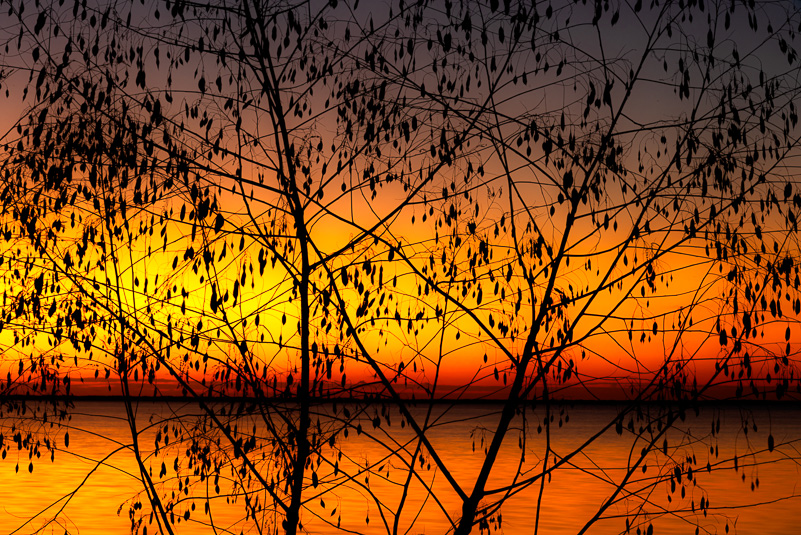
Even as the horizon is slightly obscured by the branches, it is level.
Without a level horizon, your head may reflexively lean to straighten it no matter how serene the scene.
CONSIDER EMOTIONAL IMPACT
When you are working the subject or scene, what are you seeing? What are you feeling? What do you want the image to communicate? For example, is it calm and stillness or angst and tension? Or something in between? Are you responding to a sense of balance or asymmetry? What is driving you to make the image? Maybe it’s about the colors or light? Maybe a scene works better in black and white. Be intentional. Pay attention to how each variation of composition makes you feel. Pay attention to how small changes in position impact the scene. Consider zooming in or out for a wider angle in the process. Recompose until the image in the viewfinder matches the image and emotional impact you have in your mind. It’s worth the time and effort.
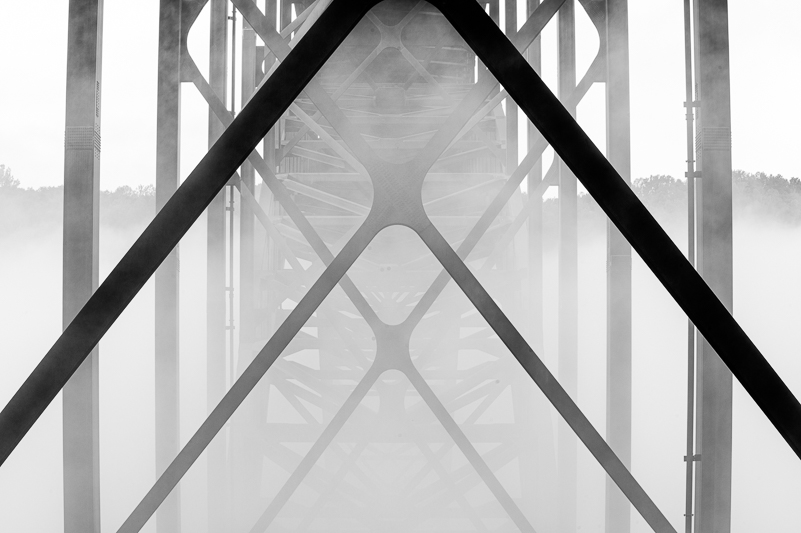
Thick fog and intentional focus on the structure and design of the New River Gorge bridge makes for impact.
TO SIMPLIFY, PAY ATTENTION
Remember, in order to simplify anything, you must pay attention to what you are seeing, feeling and what you want. It means removing every element that distracts and mixes the message. The tools we have as photographers are many. The time we spend in the field is our best opportunity to find and tell our stories and share subjects that are meaningful to us. We want our images to reflect what and how we see and what matters. Slowing down, taking our time and paring down distractions can only help us grow and create stronger images, regardless of our subject. You might consider it a boiling down to the essence. Before you start . . . stop.
As I get ready to spend another day in the field, these thoughts serve as a reminder to me to slow down, be mindful, and to simplify. My best work comes when I go deep instead of wide. I will look to simplify at every turn on this next adventure. (My office, meanwhile, is in need of an intensive, 15-minute timer marathon session. Later.)

Just sand and shadows and a fenceline.

A little more magic required for this “hobbity” scene in the Finger Lakes, but attention to placement of the opening and path and surroundings matters.

Seen on the shelf of a restoration garage and interpreted differently.

Simplicity in a sunset and cloud horizon on Clingmans Dome made possible with a graduated neutral density filter.

Pastel moments at sunset on the ocean made simpler with motion.