There is only you and your camera.
The limitations in your photography are in yourself, for what we see is what we are.
–Ernst Haas
Okay, what are we talking about here? Simply put, it’s sunglasses for your camera. Think of It this way. Have you ever been driving down the road, wearing your polarized sunglasses, camera ready for any good opportunity to pull over and capture some beautiful scenes? Maybe there were blue skies and white, puffy clouds. Or maybe you were driving through the countryside during peak fall color? Or, let’s get out of the car and head to the beach – same scenario with the blue skies and puffy clouds, but add the ocean into the mix. In any of these scenarios, your sunglasses help you to see a most attractive view. Now, take your sunglasses off. No matter how pleasing the view, it’s not the same one that stopped you in your tracks while you were wearing your “polarized” sunglasses. The same thing happens when you choose to use or not use a circular polarizer filter on your lenses for outdoor and nature photography. What?? Yup. Same thing.
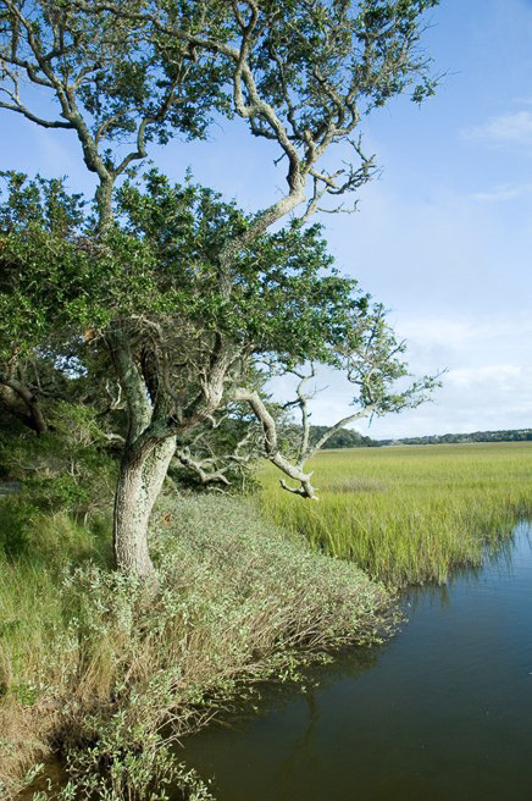
Image with NO circular polarizer filter on the lens.
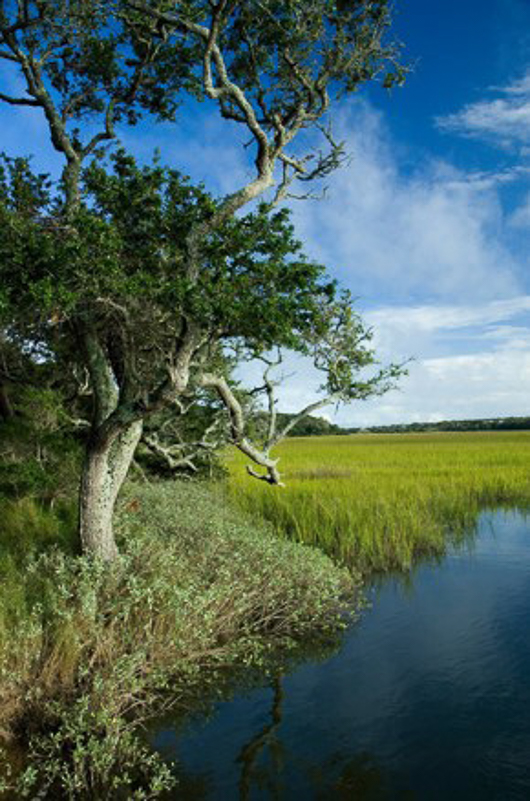
Image WITH circular polarizer. See the difference?
JUST A FEW THOUGHTS ON BETTER PHOTOGRAPHY AND GEAR
Let me start by saying that I’ve been photographing for quite some time. I’ve had a few cameras over the last 25 plus years (seven, if you count my three infrared). I’ve accumulated a good number of lenses, most of which I still use, even if only periodically. I am not a gear hound – really. I don’t feel compelled to upgrade to the newest model of anything just because a new “toy” is announced. And, every upgrade for me has been for a good reason, not a clever rationalization. In my photography there are only a few things I advocate for as “must-have’s” This is because I believe that one should maximize in the field the capabilities of whatever camera or lens combination is in your hands. They are tools. Your vision is, and should be, the driver, builder, maker or artist (whatever designation works). What you do, what we do, with the tools is up to us. And, one thing is true: the best and most expensive gear will never make you a better or excellent photographer, any more than having the most expensive car would ever make you a better driver.
That said, there are two tools I advocate for that are both likely to give you the opportunity to capture and create better quality images. The first is a sturdy tripod. If you want sharper images and opportunities to slow down, refine compositions and be certain that your images are sharp where you want them to be, then get and use a sturdy tripod. Get one that is tall enough for you to extend all three legs and mount your camera on the ball head so that you can look through the viewfinder without extending the center post.
Second, do yourself a huge favor. Purchase and use circular polarizer filters for each of your lenses. (Yes, you can get by with one or two and step-up rings, but what happens when all the pieces are not together in the bag you’ve taken into the field? S.O.L. rings the bell.) Go back to the first paragraph using the sunglasses analogy, and consider the benefits. The circular polarizer filter is probably among the smallest of lens accessories that will give you the biggest potential impact in your images. In fact, I call it the “Must Have, Choose to Use” filter. Both parts of that phrase are important. You can’t choose to use what you don’t have.

Polarizer on, but at lowest effect.
Polarizer spun to maximum effect.
WHAT IS THE CIRCULAR POLARIZER AND WHAT DOES IT DO?
Short answer – sunglasses for your camera. Serious answer – The circular polarizer filter is placed on your lens and has two parts. One part of the filter screws onto your lens; the other (outer part) spins – yes, spins. Well, you’re supposed to spin it. This filter’s most common use is to remove glare or sheen off of shiny objects such as leaves, grass, water, metal and more and to make blue skies bluer and those white, puffy clouds pop in the landscapes. I’ll leave the scientific stuff for the techies. What I know and have known for decades is that it works. Something else to know, but not stress out about, is that the circular polarizer can slow your shutter speed by anywhere from 2/3 to 2 EV stops. If that is an issue for any situation, you simply make adjustments and make it work. No big deal.
WHO NEEDS IT?
You do! If you photograph outdoors and don’t use a circular polarizer, you’re missing the boat – in my opinion. This means that if you’re shooting at the beach, in the forest or backroads or even in urban areas, the circular polarizer can be your best friend in giving you the maximum impact in the field.
Here’s what I can tell you. I feel so strongly about the value of the circular polarizer that I have one on nearly every lens I own. And, I have a collection of “back-up” polarizer filters for when I need a replacement. I also have a small collection of loaner filters that go with me on workshops to let clients borrow if they don’t have or didn’t bring their circular polarizers with them. Perhaps this drives home how important I feel they are for my own photography, and yours.
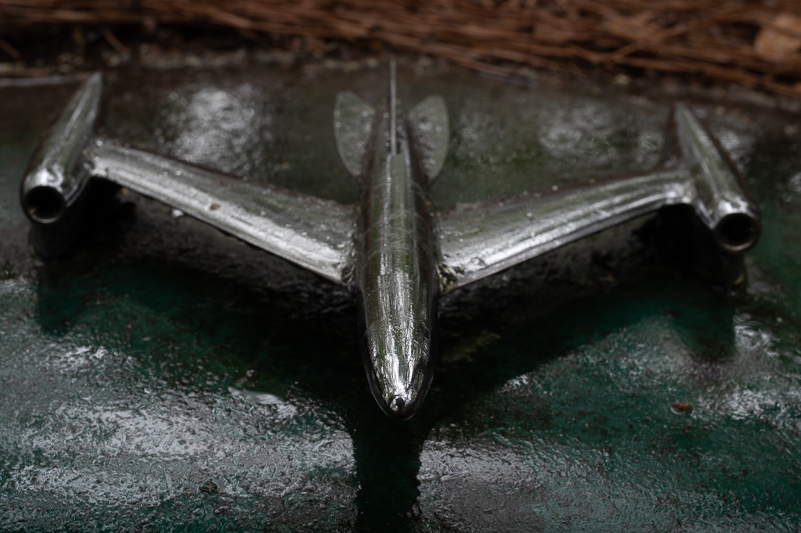
Gem at Old Car City USA – Polarizer at minimum effect (SOOC)
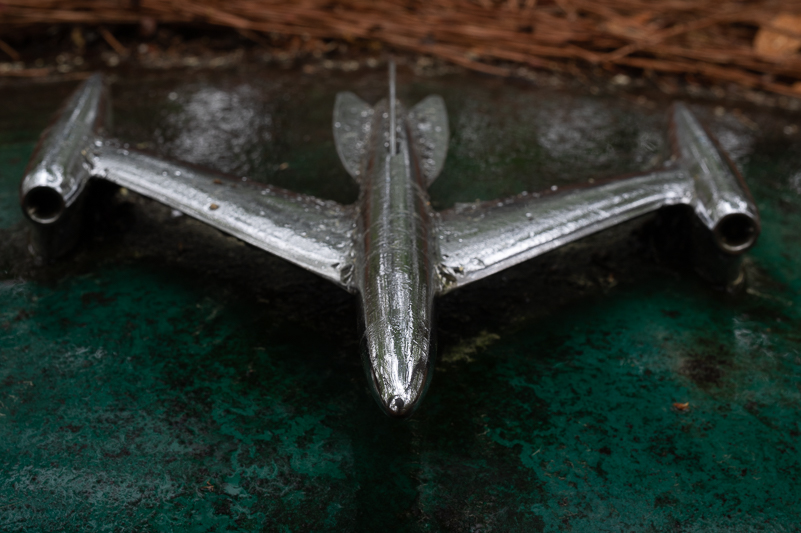
Only difference here is the polarizer spun to greatest effect (SOOC)
SOME CONVERSATIONS ABOUT “THAT” FILTER
Anyone who has been on a workshop with me or has taken a class with me has heard the soap-box speech about the circular polarizer filter. Yes, it costs much more than the UV filter, but it’s worth it. There are a lot of things we can do in post-processing, but this filter is simply better left to the field work.
Here are some exchanges I have had over the years:
“I have one, but I don’t see any difference.”
Me: “Did you spin it?” A puzzled look follows. Well, here’s the deal. You must spin that outer ring in order to see any difference. I recommend spinning counter-clockwise so that you don’t end up unscrewing and potentially losing the filter on the ground or in the water. Also, I have found that I am able to see even subtle differences more clearly in the spinning by looking through the viewfinder. It’s possible to see it using live view, but that’s not been my best experience. If you just love “live view,” then do the polarizer spin using the viewfinder and then return to viewing via the LCD screen.
“I don’t have one that fits my lens.”
Me: “No problem. Let me check my loaners and step-up ring collection and see if we can get you covered.” I’ve already said I carry loaners for my clients. Most times I’m able to get the situation resolved. I understand budgets and reluctance on some folks’ part to only buy one filter. That’s where buying the circular polarizer for the lens with the largest filter size (i.e., 77mm) and step-up rings can resolve the limitations. This is a great fix until you also want to be able to use your lens hood (another beneficial accessory that isn’t always provided with every lens). There are collapsible rubber lens hoods available that can be a good solution to having only one filter for multiple lenses. Eventually, you may conclude that having a circular polarizer for every lens works best. I certainly have.
“It’s in the hotel” … or “it’s in the car in my other bag” … or “I left it at home.”
Me: See response to the statement above, only this time add an eyeroll. What can I say? I do my best to highly, strongly recommend that everyone is well-equipped with a sturdy tripod and the circular polarizer filter. The “horse to water” proverb comes to mind.
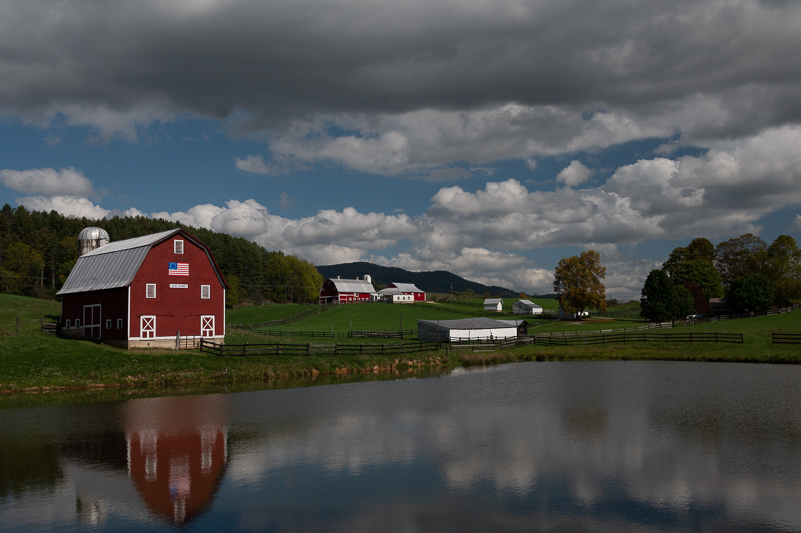
You can’t have a red barn on the edge of a farm with blue skies and drama clouds and not use a polarizer. (SOOC)
WHEN DOES THE CIRCULAR POLARIZER FILTER WORK?
Generally speaking, the filter works best when the lens (with the filter on) is at a 90-degree angle to the light source (typically, the sun). It will work at other angles, but the effect can or will be more subtle. Also, if the sun is directly above you, then you could likely see the polarizing effect pointing in any direction.
The filter also works best when you spin it counterclockwise while pointing in the direction of your subject. If you are shooting in horizontal format and then change to vertical, you must re-spin the filter. If you don’t, you won’t see a positive change in the effect of the filter. Same principle applies if you point the camera in a different direction. Every time you change subjects and/or angles, you should re-spin the filter for the best results.
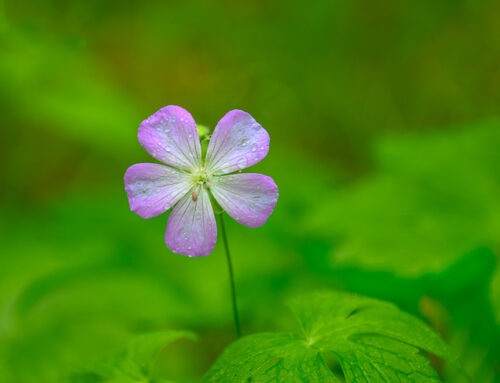
My primary reason for using the circular polarizer in my nature photography is to control the level of sheen on flowers, petals, leaves and other outdoor scenes for the best rendering of color and contrast (meaning that I get to do this in the field instead of trying to reproduce the effect in post). I also often use the circular polarizer in tandem with neutral density (ND) filters for long exposures. Yes, the exposure times are longer, but I’m on a tripod. Because the combination works, I don’t worry about time.
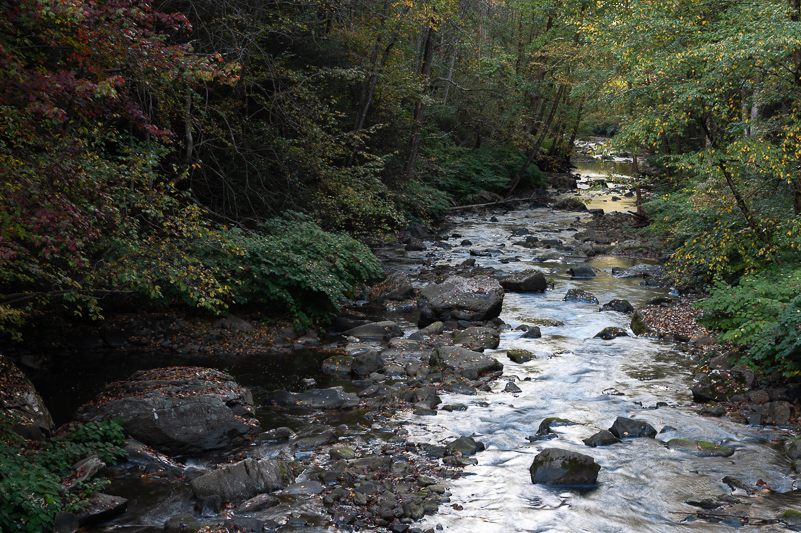
Shooting downstream – no polarizer (minimal edits)
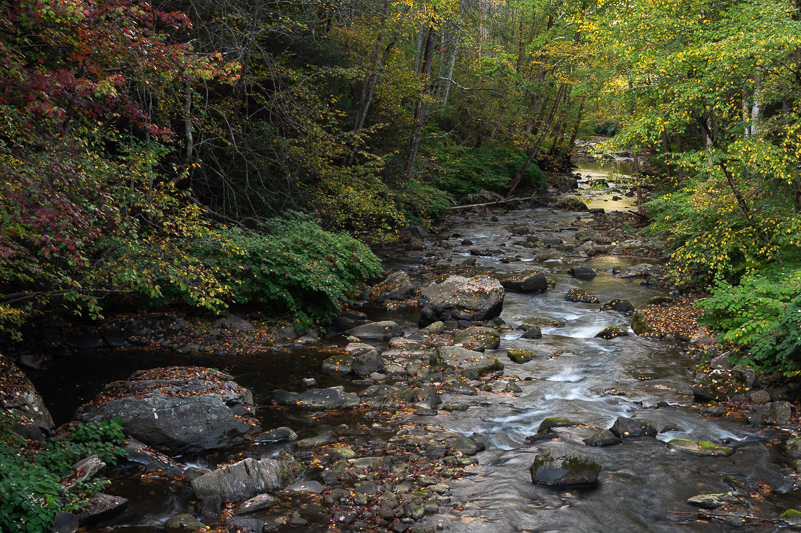
Shooting downstream with polarizer (minimal edits)
Common situations where the circular polarizer filter will work include: 1) Removing or controlling glare or reflections; 2) Adding “pop” to blue skies & white, puffy clouds, foliage, flowers, fall colors; 3) Controlling glare and shine on metal structures (i.e., old barns & houses with metal roofs), cars, windows, windshields; 4) Controlling glare & sheen in cityscapes and store windows, and more, to name a few.
WHEN NOT TO USE CIRCULAR POLARIZER
Can you believe it? I’m actually giving you opportunities to be glad to take the “magic filter” off or not use it! There are some situations where using a circular polarizer is not advised, and I have experienced some of them early on. One situation is when you’re using an ultra-wide-angle lens. Depending on where the sun is in the sky (or your scene), using the filter can give you an uneven effect that is very distracting and not so easy to fix. And, it won’t matter how you spin it. Another situation where the circular polarizer may not be recommended or helpful is when shooting panoramas. Again, you have less control in the effect as you shift the lens to “build” the pano.
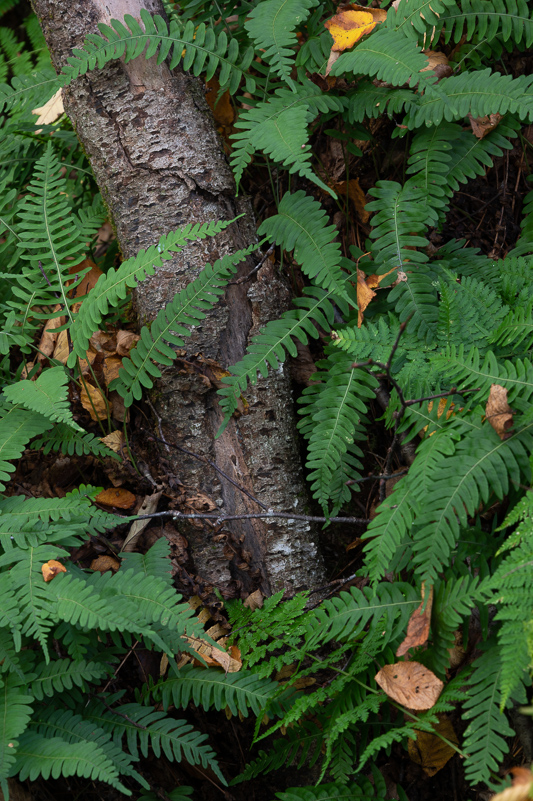
Glare and sheen gone, foliage popping – polarizer on and spun (minimal edits)
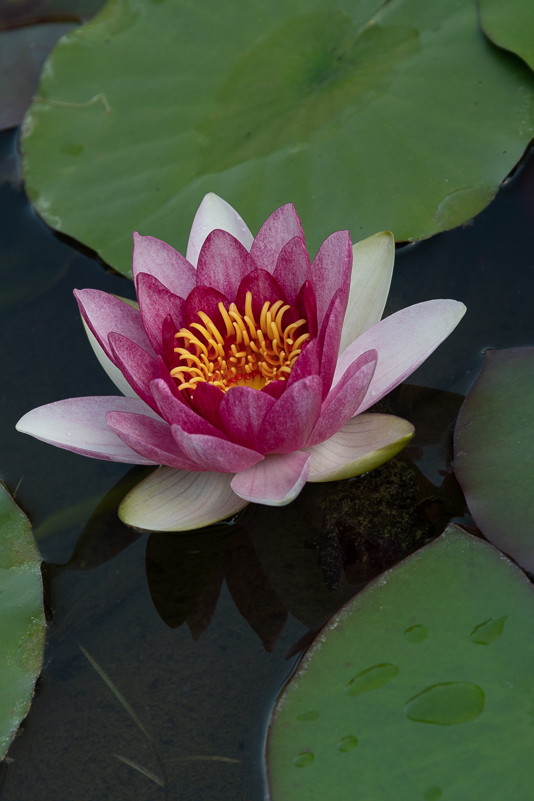
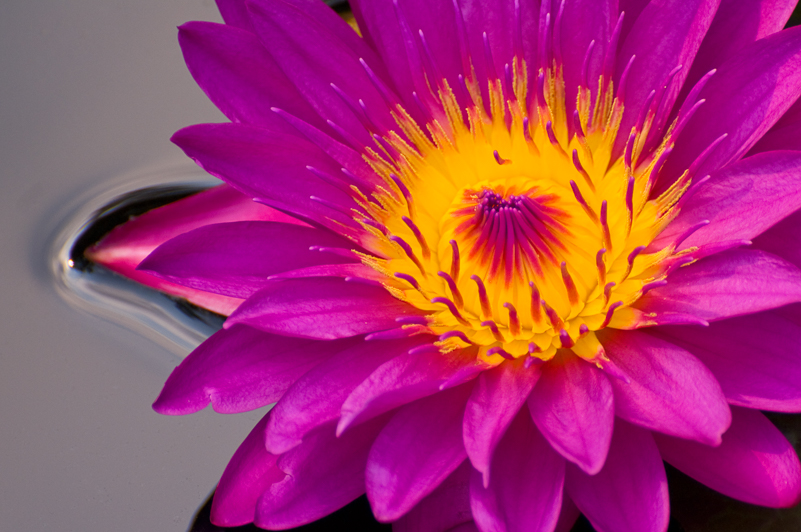
Water lily and pads with polarizer at lowest effect. (SOOC)

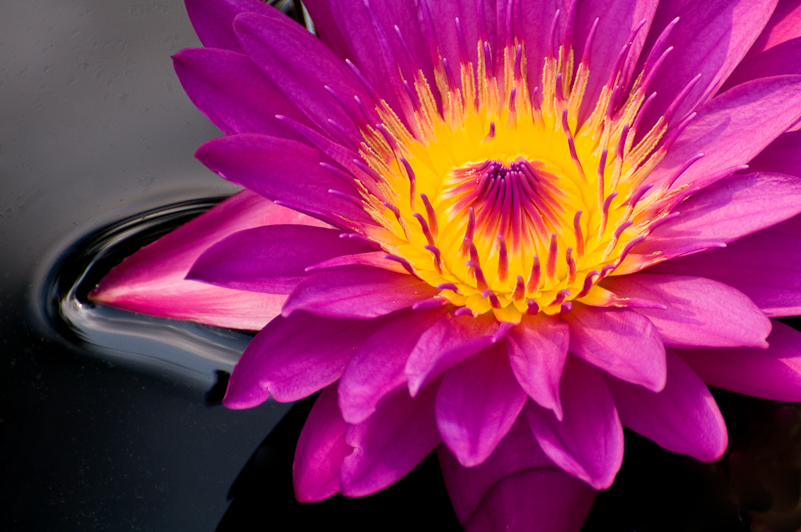
Water lily and pads, spun polarizer – darker water, more “pop” (SOOC)
While I do not photograph people (portraits, weddings, events, etc.), you might consider removing the filter for outdoor portraits depending on the angle to the sun. Many portrait photographers I know do not use the filter outdoors. Also, you would not want to use this filter for indoor shooting unless there was a specific reason. Typically, when I do my indoor set-ups, I remove the polarizer. It is not doing anything but slowing down my shutter speed.
Lastly, I would not recommend using the circular polarizer filter in low-light situations (blue hour, night photography, etc.) Unless you have a specific reason to use the filter in low light, I would not. Bet you’re surprised to hear that.
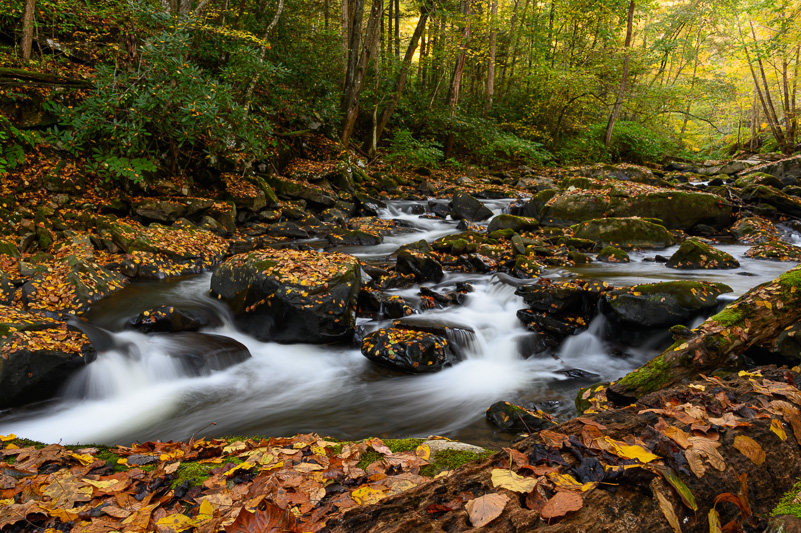
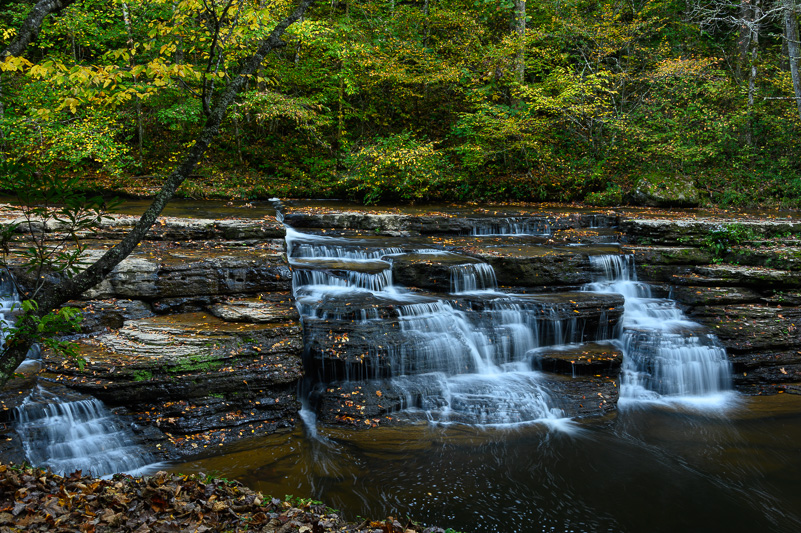
Flowing water in autumn stream – on tripod, polarizer on and spun.
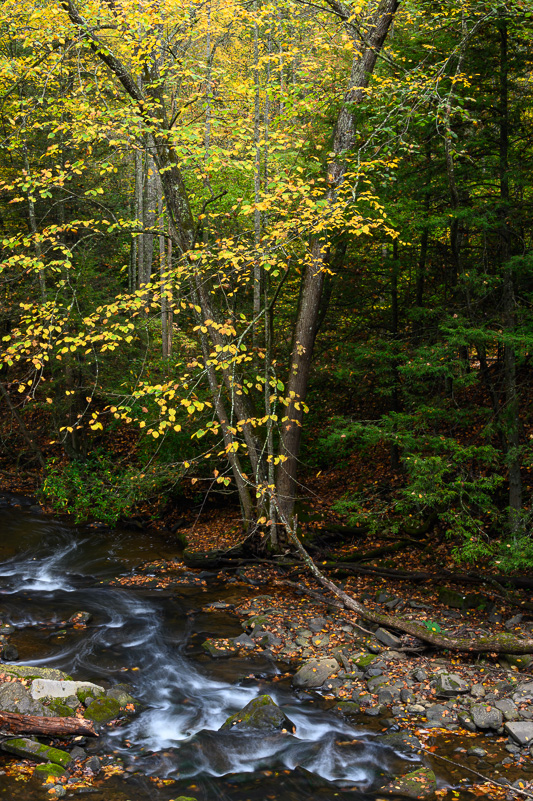
Fall from the bridge near Thurmond – Tripod & Polarizer
CAN’T I REPRODUCE THE EFFECT IN POST-PROCESSING?
Well, at first glance, I would say “no” to the average photographer who doesn’t enjoy “futzing” on the computer. Even after having been at this for over two decades, I haven’t found a good approach to recreate the circular polarizer effect. I have tried the polarization recipe in Nik Color Efex, but, honestly, it’s just not the same as doing it in the field. My question would be, “Why?” Why push something to post when using a simple accessory in the field works so much better and is more controllable? More power to you if that’s what you choose to do. Me? I’m going to put that circular polarizing filter on every time and use it to its greatest potential.
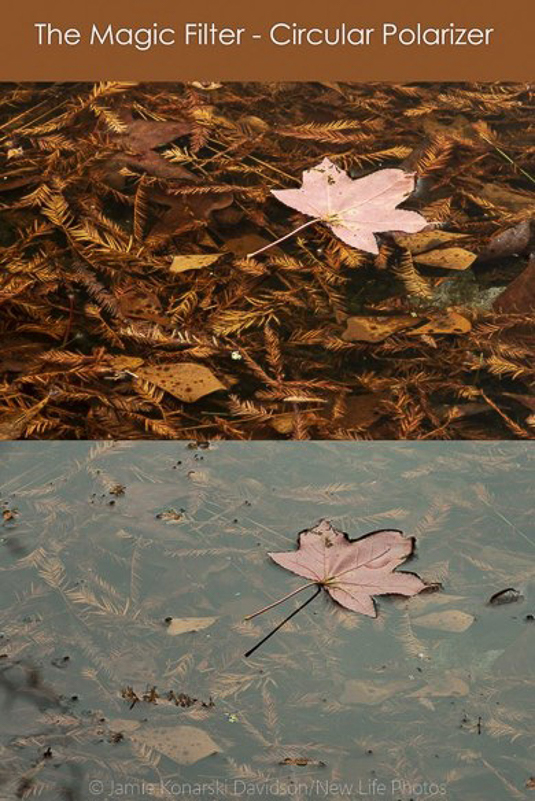
The “Magic Filter,” when spun, lets you see through water!
LAST WORDS
Just so you know, it’s really hard for me to find images where I have not benefitted from using the circular polarizer. Even the before/after images in this post are most likely to reflect adjustments made using the polarizer. (A few show with/without the filter. Most show the least/most (and best) effect from the spin. So, “Polar … What?” Just about everything. It’s why I call it the “must-have, choose-to-use” filter or the “magic filter.” I choose to use it nearly all the time as most of my shooting is outdoors. My opinion? It is well worth investing in this small, but powerful, accessory. Your images, and mine, are worth it.
(NOTE: If you’re wondering what prompted an entire blog post on a tiny filter, it comes at the request of some recent workshop attendees. While we were doing image sharing, a question I frequently asked was whether they had used “that” filter. I heard all kinds of reasons or excuses for not using it. They knew what I would say …. Thanks to them for giving me this idea. They know who they are.)

Peonies at Lewis Ginter – Shining When Polarized
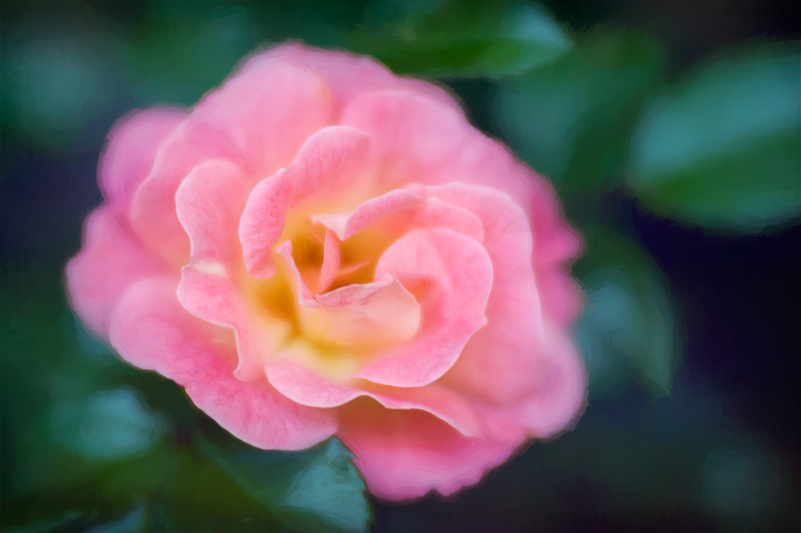
Even a glowing rose from Lensbaby Velvet 85 benefits from the polarizer
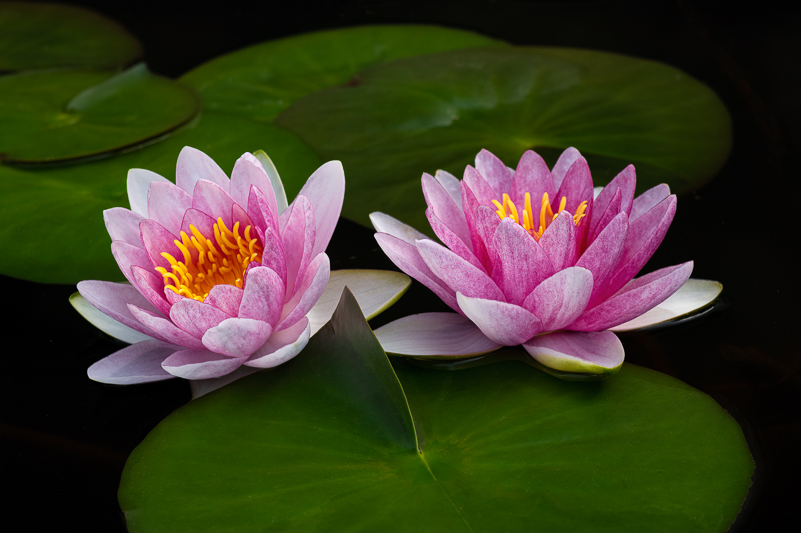
This pair of beautiful water lilies showing their best sides with the polarizer

Polarizer removed glare on metal and made the fallen leaves pop with color.
Now you see the sheen …
And, now you don’t.