You should edit before and after editing.
–Dwayne Fry
TRANSFORMATIONS
Maybe it’s because I watch a lot of home improvement programs. Or maybe it’s because I also watch a lot of cooking shows (even though I don’t cook). It’s a mixed bag. What I see in all of the above is the idea of taking something as it is and transforming it into something far better and much closer to something worthy of appreciation. This “better” and “worthy of appreciation” concept is subjective. Those who take houses or rooms that are in desperate need of a “re-do” have the ability to see the raw materials, envision the potential and possibilities, and then make them what they could be. These designers also have or learn the skills they need to make it happen. Whether the space needs a demo and complete reconstruction or a few coats of paint, vision is required for the transformation.
And, on those cooking shows, especially the competitions, the same concepts apply. The chefs or cooks or bakers are given random ingredients paired oddly with instructions to “make something” or to make one ingredient “the star” of the dish. The cooking challenges require quick thinking and risk taking, imagination and skills. The renovation competitions may have a bit more time and money, but the goal is the same. Make something work. Make something better, beautiful, functional, and/or delicious.
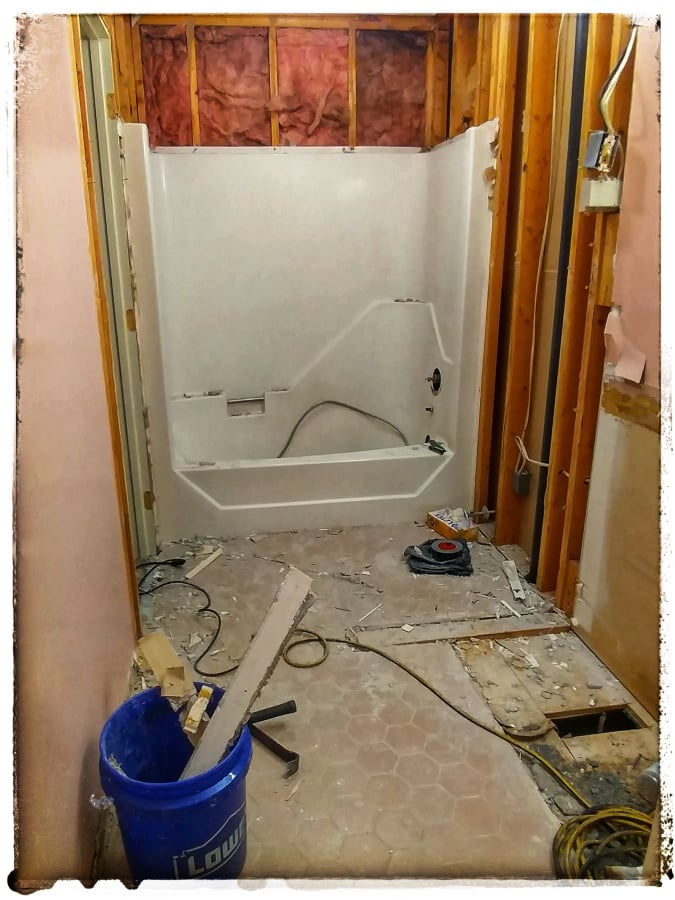
Scene from the bathroom renovation (extreme makeover) this past spring.

Partial view of the “After” from the spring bathroom remodel. (We did not do the work.)
IMAGE TRANSFORMATIONS
How we work on our images holds similar concepts and goals. We’re given the raw ingredients – whether in a landscape, still life, flowers & gardens, portraits or any other subject. We’re given what we’re given, and it’s our “job” to make it work. For this post, I want to remove the element of competition. The transformations included here are about moving from the raw to finished product – an image that is pleasing to ourselves. I’ve said this before, we must first please ourselves, unless our work is for a client. We do not, and should not, be concerned with being judged or “winning.” That mindset influences our imagination and risk taking and keeps us from “playing dress-up” with our images.
The result of going with creative flow in the editing process until the image looked like the moment felt.
IMAGE MAKING COMES FIRST
There’s a saying, “Just because you can, doesn’t mean you should.” I sometimes feel like a broken record, but that’s okay. In our image making, we need to spend time with our subjects, decide what our goals are, evaluate what it will take to make it happen, and then do it. We need to learn what we need to learn. We need to try new and different techniques without the expectation of being perfect in our early efforts.
Yes, we have amazing post-processing tools at our fingertips that can “fix” just about anything we didn’t or couldn’t do in the field. “I’ll crop it later, fix it in post, swap the sky, hide the defects with textures or some other method.” I hear these statements and more and continue to encourage (almost insist) that the best work be done in the field. The idea is simply to rely as little as possible on the “fixers” and work under the “refiners” perspective.
Are there times when we don’t have a wide enough or long enough lens? Yup. Are there times when much in a scene works, but there are elements out of our control? Of course. We either decide to make the image knowing what it will take to achieve our goal or we decide to appreciate the scene for what it is and walk away. Are there times when the light isn’t ideal? Of course. We work with what we are given and make whatever adjustments we need to, even if it means we don’t make the images we had expectations of making.
The images we make and get to choose to work with fall in several categories, including the ones requiring very little “make-up” through to those that need a “total makeover.” I prefer not to work with the latter.

Intentional spin movement along with Lensbaby Twist in spring gardens.
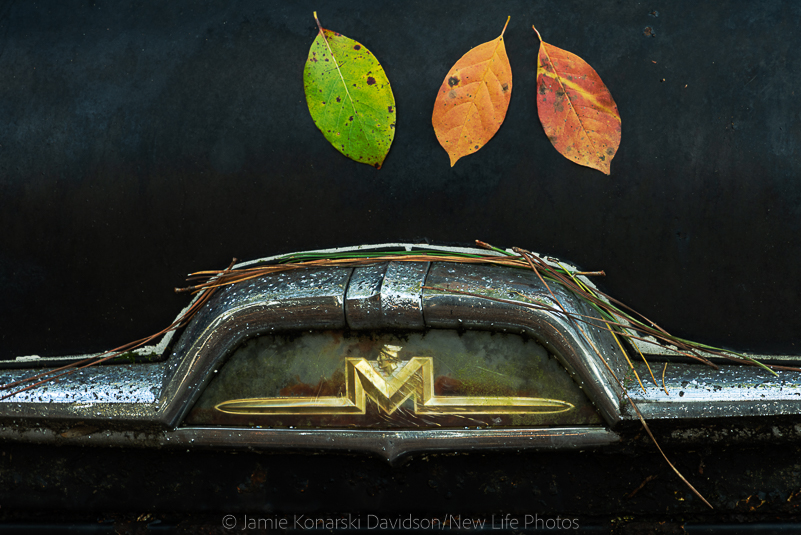
Simplifying the image in the field to isolate what stopped me. Leaves left where they were.
ACCEPTING THE CHALLENGE OF “BEFORE AND AFTER”
In light of the “before and after” challenges and concepts from home improvement and cooking shows, I thought it would be interesting to apply similar work to my own images – not to please anyone but myself, but to lift the hood and share thoughts from behind the scenes. I decided to “troll a hard drive” and choose three random images, and then document the work. Each image has a different degree of challenge. In the process of sharing the “raw” material, I talk about the image itself, what works and what might not work, goals in the field, and what I feel is needed to achieve the final result. I also share some of the “in-between” work.
The images I use vary in subject and degree of need for refinement, repair and reconstruction. I start with an image that simply needs a coat of paint. The next image is in need of what I would call mid-range work. The third image needed an “extreme makeover,” and I only use it to illustrate the higher level of work and much longer investment of time to achieve the result. Truth be told, I had no intention of ever processing it. Rather, I took the image to remind myself of the opportunity to revisit with better conditions.
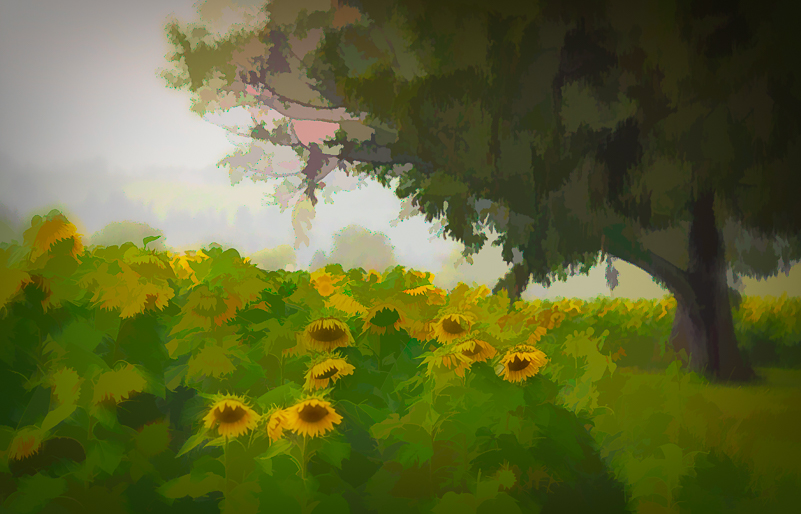
I loved the framing of the tree and the lighting on the sunflowers. To get where I wanted to go with this image, I worked with Topaz Studio 2 tools to create a more abstract look that felt right to me.
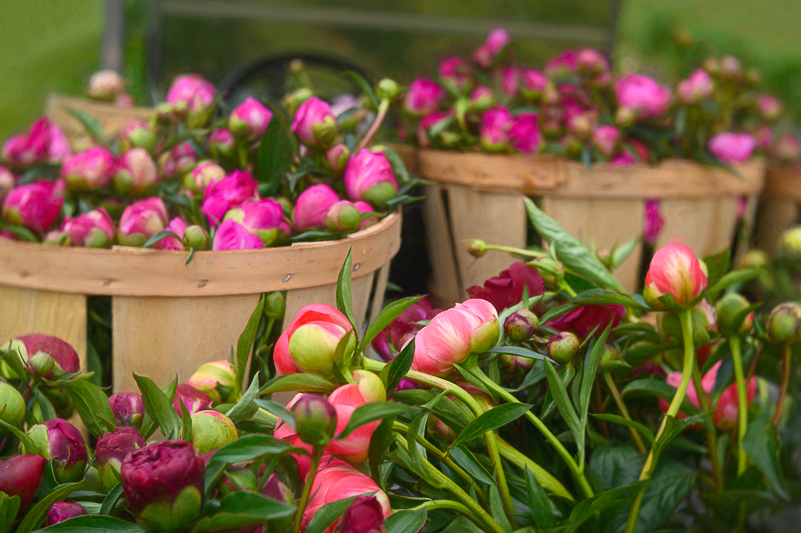
COAT OF PAINT IMAGE – PEONY HARVEST WITH LENSBABY VELVET 56
I loved having the opportunity to photograph peonies being harvested and loaded into bushel baskets to go to market. It was the first time I had seen this, and the light conditions were perfect. I was using the Lensbaby Velvet 56, which also worked well in creating a more ethereal effect. This image needed very little work for me to get to where I was happy and where I saw it going.

No cropping here. In Adobe Camera Raw, I made adjustments to shadows, texture and clarity and optics. For me, the image told the peony harvest story and showed a sense of place and perspective. Issues were bright areas on left side and dark corners on top. I knew I wanted a subtle artistic look.
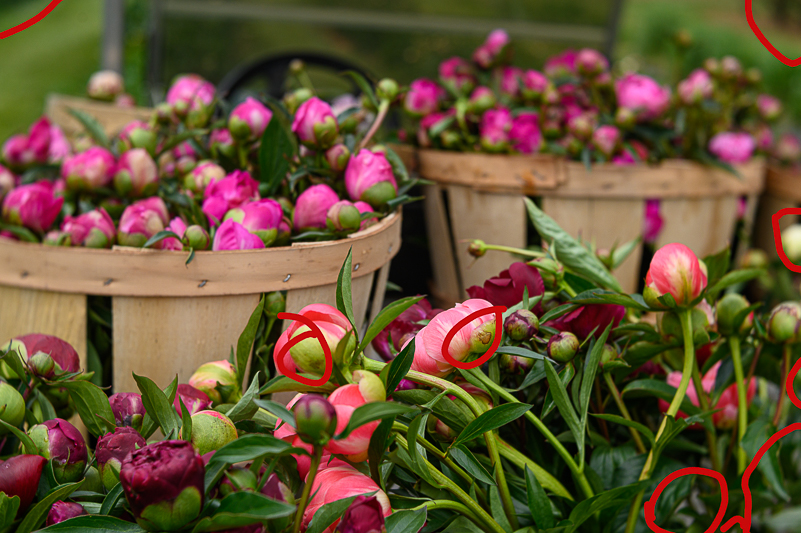
The “issues” for this image, circled in red, were simple fixes – burn/dodge and spot healing tool.
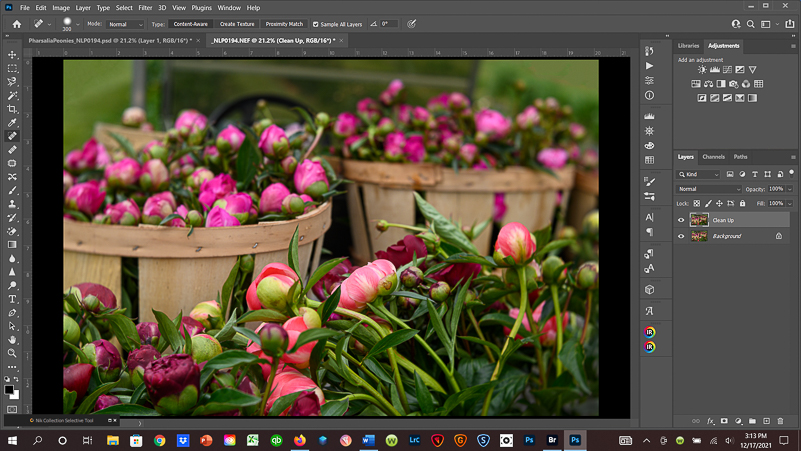
Results of the minor “clean-up” issues. Now, we are ready for creative refinement. Topaz Impression on the horizon.
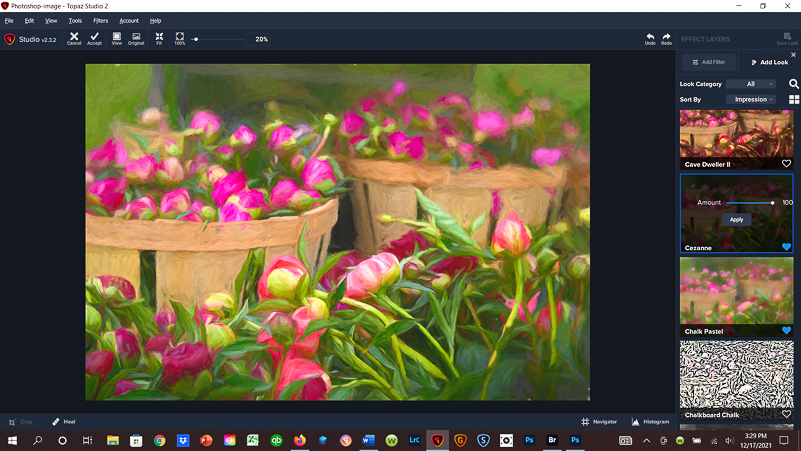
Using Topaz Studio 2, first applied AI Clear Filter. Then, in Topaz Impression (Add Look), selected Cezanne. This image shows the effect at 100%. Typically, this does not work for where I want to go with an image. Lowering the strength is generally more pleasing.
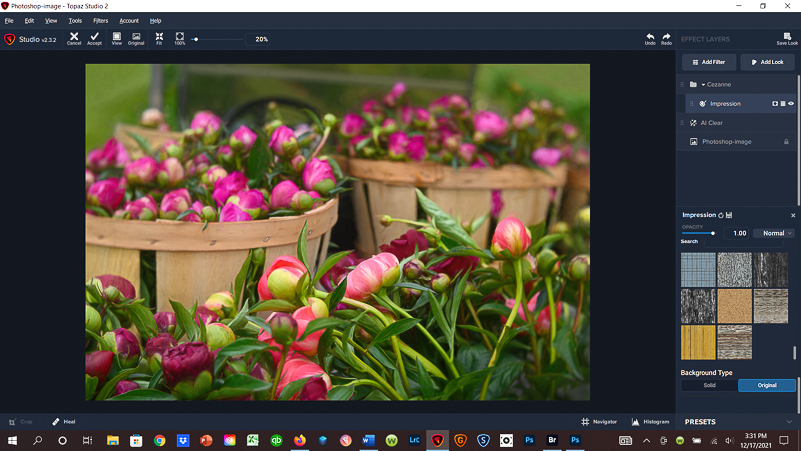
I turned down the “volume” of Cezanne to 30%. Tip: If you notice small gaps or holes in the image, scroll down in Impression to the Texture section of adjustments until you see “Background Type.” Click on “Original,” and holes will be filled. Click “Accept” and return to Photoshop.
With a few small adjustments and a little help from Topaz Impression and Cezanne, I now love the image even more. The Lensbaby Velvet 56 helped with the look from the beginning.
MID-RANGE WORK IMAGE – BUICK AT OLD CAR CITY USA
I could spend weeks at Old Car City USA in White, Georgia. I’ve been going for years and spending time with and without workshop groups every year. Each visit gives me something new and different to discover and photograph. The light varies, the weather varies, and my mindset and lenses I use vary as well. I can’t remember photographing this particular Buick before, and the light was “fine” though a little bright. This image needed some refinements and a little more time for me to reach an end result that felt good to me.
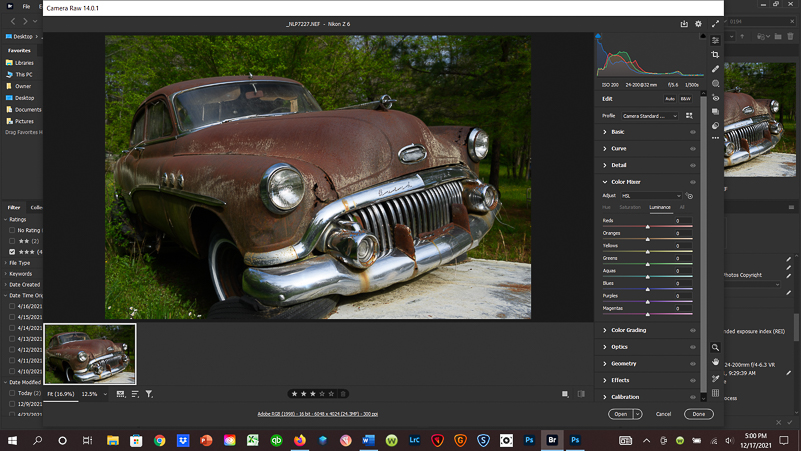
Working this image began in Adobe Camera Raw. This shows it as the raw file was opened – no sliders adjusted yet.
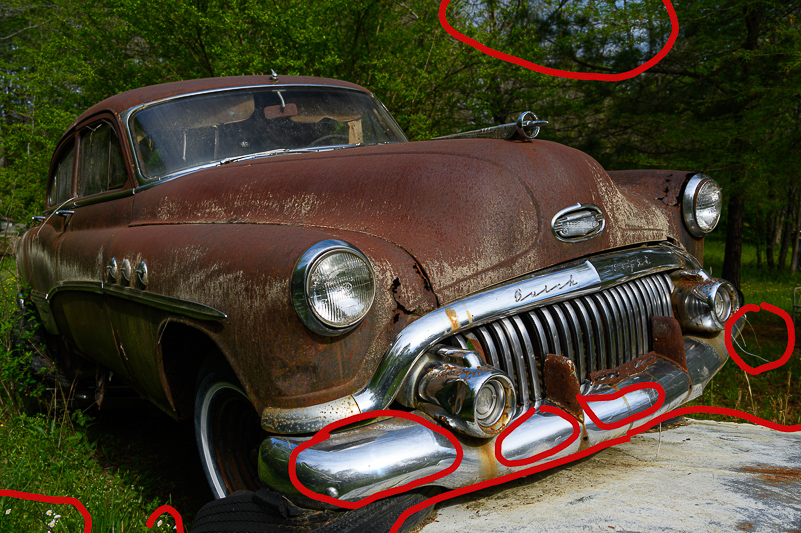
Circled here are some of the issues to address – sky opening in trees, small white flowers in corner, bright concrete in front of Buick and the chrome.
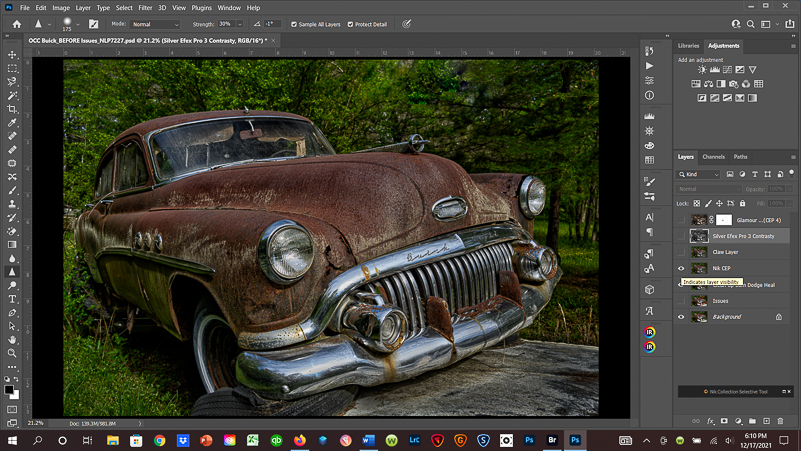
Here is the “clean-up” and Nik Color Efex Pro – Detail Extractor, Tonal Contrasts, Dark Contrasts. It was getting closer to what I felt would work for this image. I use the Nik Collection regularly.
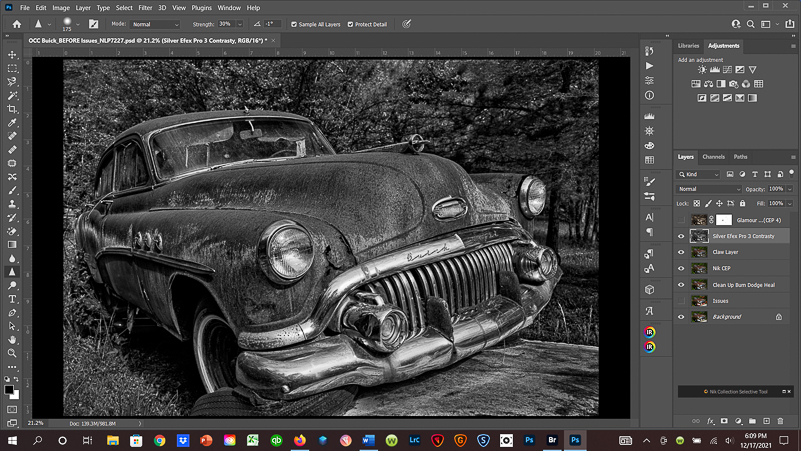
I felt the image would work better in black/white, and used Nik Silver Efex Pro and the Contrasty recipe. I liked it, but felt one more step would make it even better.

Last steps for this image included using Nik Color Efex Pro and choosing the Warm Glow setting under Glamour Glow. Final touches including lightening the headlights on the Buick. These steps took a little bit more time, but are part of my process in going with the flow until the image feels good (to me).
EXTREME MAKEOVER – FINGER LAKES BARN REFLECTION IN MUCKY POND
This image was quickly taken to record the potential opportunity for a future visit with hopes that the next time the pond would not be covered with swaths of muck. I did not intend to process the image. In addition to the muck, there were poles and wires, people, a mailbox and other distractions in the image. I have much more pleasing options to work with, and I will. It took about 45 minutes to reach the final result, which surprised me. However, if I didn’t have a game plan, skills and tools to get there, it would have still been a hot mess, and I wouldn’t be showing it here.
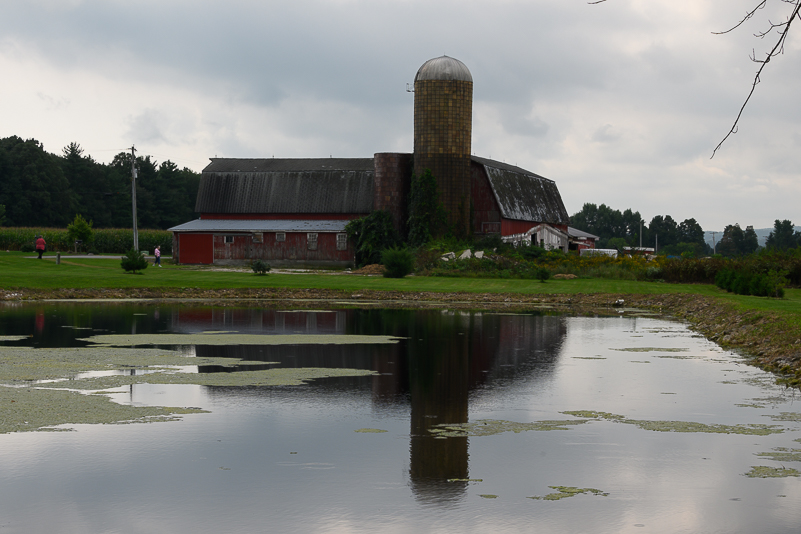
Yup, I know. This is not even a bit “pretty,” and has a bunch of issues. Call it what it is – ugly. It needs an extreme makeover. I can already tell that this is going take more time than I really want to spend.
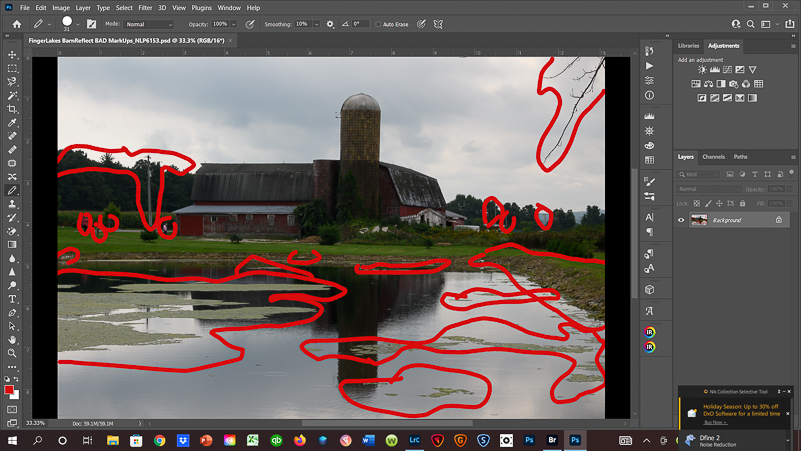
Clean-up on this is a real drag. From the muck-covered pond to poles, wires, people and a mailbox, for starters – Uggh. The Spot Healing and Healing Tools were most helpful. In Adobe Camera Raw, I brought up the shadows and feel an inkling of hope.

After spending more time than I would have ever wanted to, most of the most offensive issues have been addressed. The muck was challenging as it was covering some of the reflection areas, too. Not sure that a long exposure would have helped here.
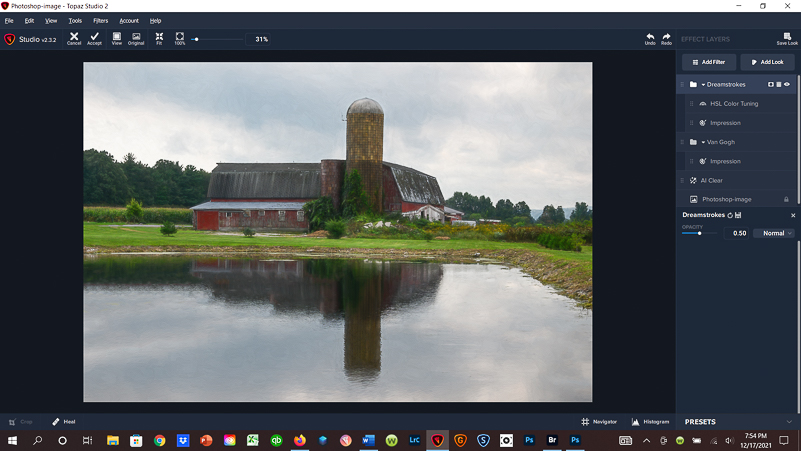
Next steps included Topaz Studio 2, using AI Clear and Impression. I used two recipes – Van Gogh at 20 strength and Dreamstrokes at 50. Again, I was surprised at the apparent “fix.” Final issue was the edge of pond on right side. Oh, joy.

To “fix” the edge of pond on the right, I tried several options. None of them were successful for my taste. For a crop, I needed the silo above ground and in reflection in the frame. The 5×7 ratio worked best.

FINALLY, after roughly 45 minutes, this image was complete. I am relatively and pleasantly surprised at the result. However, working this image would never be my first choice. It kind of sucked at the beginning, and not in a good way. Whew! I’m glad that’s over.
FINAL THOUGHTS ON TRANSFORMATIONS
One could argue that “saving” an image can be a fun challenge. Honestly, for me, it’s not. I have better things to do with my time and more “worthy” images to process and share. Photography is a creative and therapeutic outlet for me. I do it because I love discovering new places and subjects, revisiting and sharing them. I love creative challenges, especially with my favorite subjects. Flowers are at the top of my list. The challenge, then, is to find different ways to express their beauty and uniqueness without doing the same thing with them. The challenge, and fun, is finding new directions and following a more expressive path. The challenge is met with openness and learning new techniques.
Reminders to you, and to me: Slow down, take your time, enjoy the image making process. Think about the “why” of the image. What made you stop? Decide who the “star” is, and make it clear. Identify distractions and detractors in the field first, and edit them out there – either entirely or as much as possible. Consider your vision for the final image. Keep your eyes and mind open to serendipity. Allow yourself to be surprised. And, finally, enjoy the moments – all of them – even if they don’t give you the images you were hoping for.
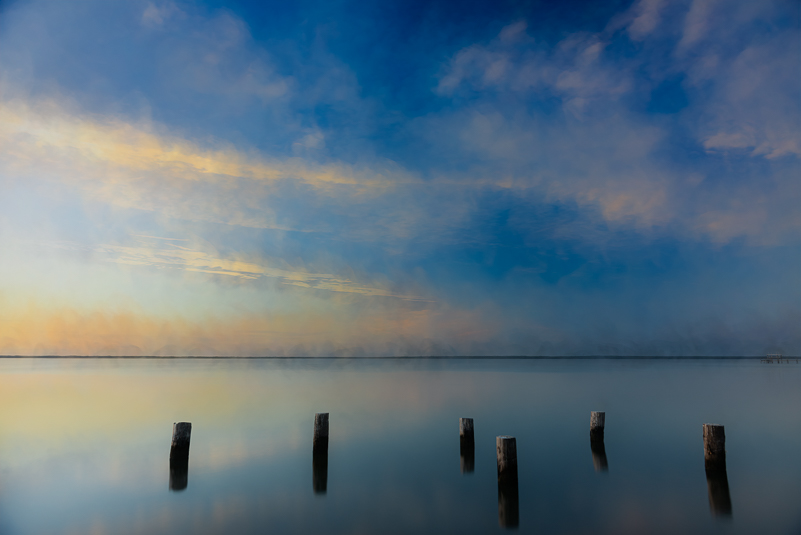
Artistic rendering of pilings in water at sunset and a long exposure. I’m sure Topaz Impression was part of the process.
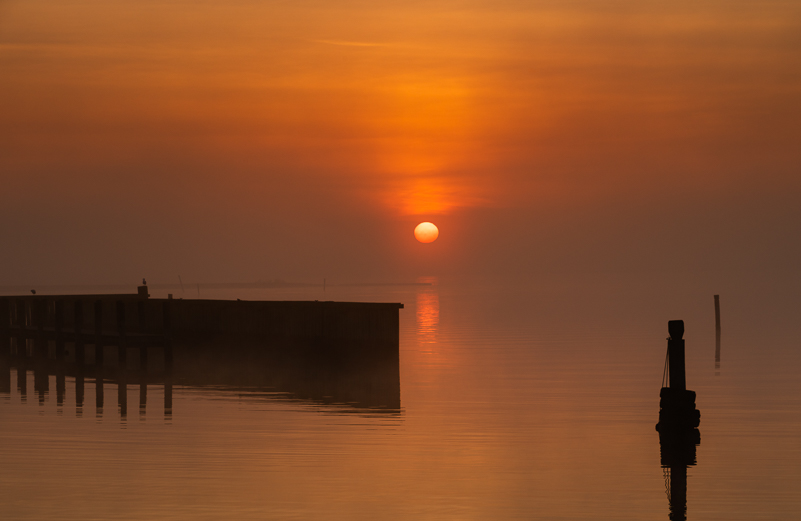
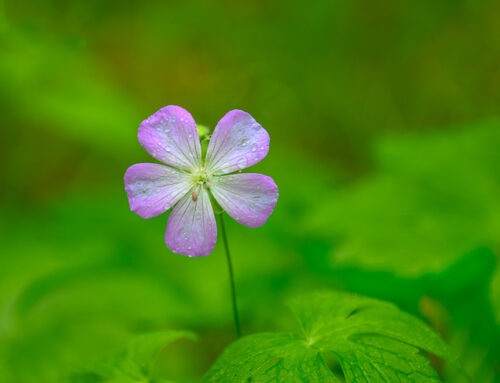
Often, nature provides all you need to create an image. Simple scene that needed only a “coat of paint.”
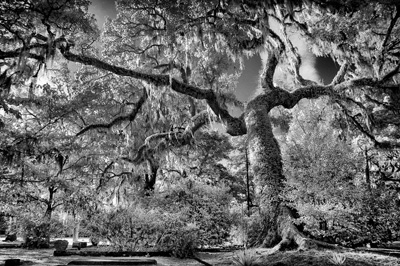
Infrared photography opens up avenues of creativity on many levels, and makes good use of less than ideal light. This image made with Nikon D90 converted to 590nm – processed for faux color BEFORE using Nik Silver Efex Pro for the black/white version.