
There is only you and your camera. The limitations in your photography are in yourself,
for what we see is what we are.
– Ernst Haas
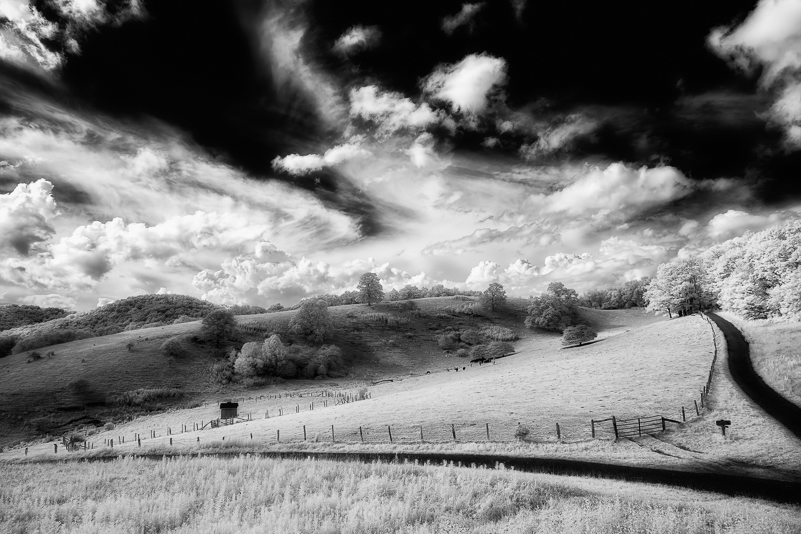
It’s been a while. The last time I wrote about infrared photography was over three years ago (Interpreting Invisible Light). At that time, I was shooting with two converted DSLR cameras at 590nm and 850nm, basically putting me at both ends of the spectrum. These days I am shooting with a Nikon Z6 mirrorless camera converted to full spectrum (more on this later). Infrared opens up a whole new world of exploration and art, in part, because the camera is able to capture what our eyes cannot see. We enter the world of invisible light, which allows us to create images that bend reality.
CURIOUS ABOUT INFRARED?
If you are new to infrared, don’t feel that you have to move to a mirrorless camera in order to dive in. Yes, there are some advantages, but, ultimately, it’s the learning, shooting and processing results that matter. Learn what you need to know before purchasing or converting your first infrared camera. As for me, it’s only been a few years that I’ve been shooting mirrorless, in color and infrared. The first nine years of my infrared adventure were all with my two converted DSLRs.
And, in case you didn’t already know, infrared photography has been around for a very long time. The first infrared film was developed in 1910 by Robert Williams Wood. It required long exposures to record the light and capture images. (Similarly, if you try to shoot infrared using a filter over your color camera, you invite long exposures and a host of other issues that a converted camera avoids.) It wasn’t until the 1930s that infrared film became available to the public after Kodak developed film emulsions for infrared. Over time there were more than forty types of IR film to choose from. Not so, today.
As with any type of photography, infrared is not for everyone, but I’m thrilled to have it as one of my tools. I do know that without having given it a try (reluctantly), I would never have known how much I would enjoy and embrace it. If you haven’t tried it and have the opportunity, give it a whirl. I mean, I have to admit that I, too, was a skeptic and not super keen on the suggestion that I “needed” to shoot infrared. I didn’t even know or understand what a nanometer (nm) was … It’s a wavelength of light. However, with a converted Canon 20D in hand and no directions, I took 590nm out for a spin that lasted three months before I got a chance to sit down and learn how to post process. In that experience I found a world of infinite possibilities that expanded my creative vision in ways I could not have anticipated. Admittedly, I never saw myself five cameras deep in the infrared world, but here I am.

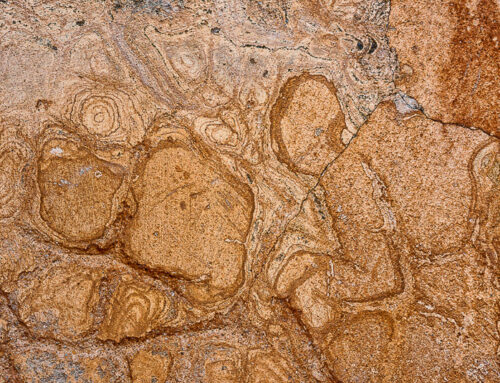
Palm abstraction with 665nm and faux color.
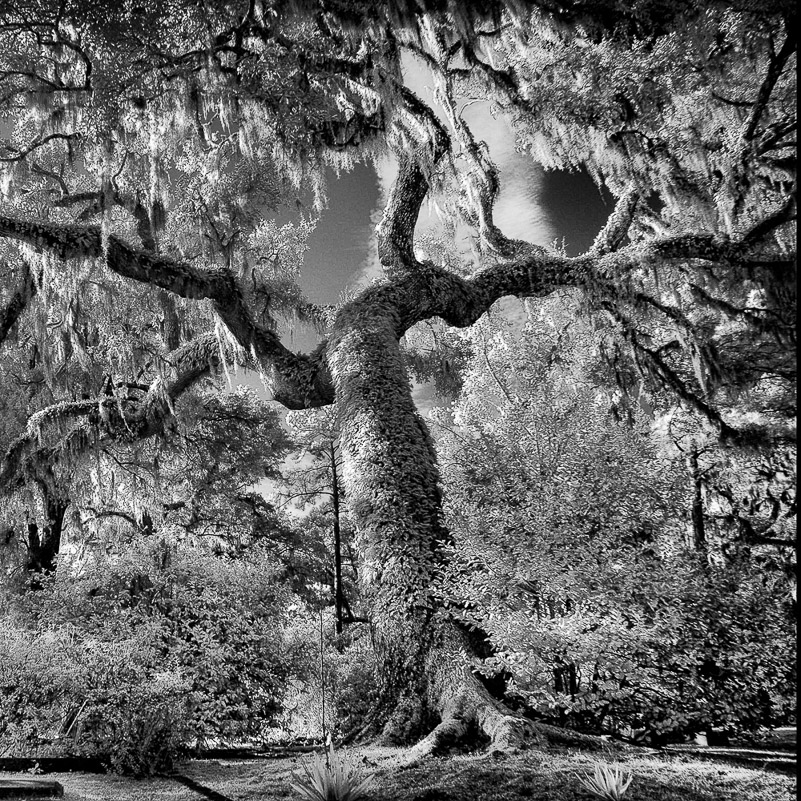
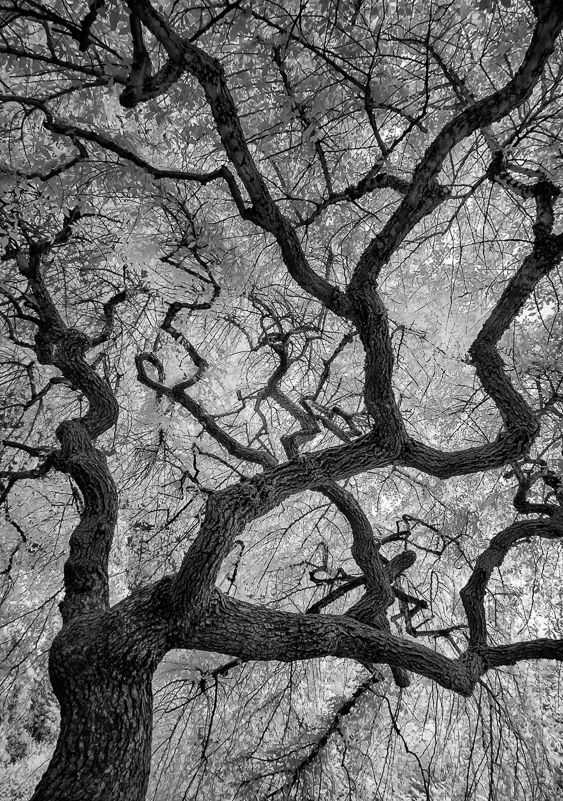
Pawleys Island oak with 590nm.
PRACTICAL TIPS BEFORE THE ART
If someone were to ask me what they need to know to get into infrared, here are a few things I would share:
Camera and Conversion Choices
Decide whether you want to convert a DSLR that you’re no longer using, purchase an already-converted camera or purchase and convert a new camera (DSLR or mirrorless). And, do your research on what is possible with various wavelengths and which best suits your interests and style. There are options for everyone. As for conversions, you can select a single wavelength or a full-spectrum conversion for more flexibility.
For example, if your primary interest is black/white photography, then perhaps your best choice would be an 830nm or 850nm conversion. If you want some flexibility with color and black/white infrared, then the standard 720nm conversion may be the place to start. You can pull out some colors with the blue/red channel swap and in post-processing, but not as much as the next set of choices. If you love color and the flexibility of playing with colors in post and don’t mind spending time processing and experimenting, then choosing 590nm to 665nm and other wavelengths below 720nm may be for you.
If you’re like me and love to keep your options open, then a full-spectrum conversion is the best choice. Then, you can purchase filters at whatever wavelengths you like and easily change them out as your mood or the situation calls for. (I have two cameras converted to full-spectrum – my primary Nikon Z6 and a Canon RP, which I use as a loaner for workshops.) The flexibility for me is important. And, while I have filters ranging from 550nm to 850nm, plus the IR Chrome and Hot Mirror filters, the ones I rotate the most are 590, 665, 720 and 850. Occasionally, I will use the Chrome filter and love what it generates straight out of the camera. The Hot Mirror filter allows me to shoot in “normal” color.
Faux color party at Raulston Arboretum with 590nm
After the “party” comes black/white with 590nm
Lens Choices
One of the “sticky wickets” of infrared is that not all lenses work well for infrared. This is primarily due to the “hot spot” issue. If you’ve done any research, you’ve heard about this. A hot spot is a bright circular area (spot) that varies in size and intensity and lands smack-dab in the center of your images. It’s not lens flare. Sometimes, it can be subtle, but when you see it (and it’s bad), it’s more than annoying. It’s very challenging to remove or fix (though there are ways), and it makes the infrared experience frustrating.
Some lenses are “perfect” for infrared and generate no hot spots at any focal length or aperture. (My Nikon 24-120mm f/4 is one of them and has a permanent home on my Z6.) Other lenses are beyond terrible – hot-spot city no matter the settings or lighting situation. And, then, there are lenses that will work well with limitations – focal length and aperture choices. It’s best to do your research before you dive in. Several companies and photographers have done testing and have compiled lists of lenses that are “good” and “bad” for infrared. One of them can be found on the Kolari Vision website.
Shoot in Raw and Watch Your Histogram
As with all photography, shooting in Raw is the way to record all image data and provides you with the most flexibility in post. This is especially important with infrared. If you want, shoot “Raw + JPG,” but don’t miss out on the raw opportunities. And, while you’re at it, go ahead and find your histogram display on your camera, and use it. (You’d be surprised at how many don’t take advantage of the information it provides.) With 720nm to 850nm, you can generally rely on and pay attention to the luminance (white) histogram display, watching to keep your exposure from having unintentional blown-out highlights.
With wavelengths below 720nm (665, 630, 590, etc.), you want to turn on the RGB histogram display and be sure to keep your RED channel within the goal posts (no over-exposure). The reason is that these wavelengths integrate both infrared and visible light. Blowing out your Red Channel has the same impact in post as blowing out your highlights in color photography – loss of detail and information. Believe me, it matters. Plus, you should know how to access your histogram display anyway. With these lower wavelengths, the Red Channel is always slightly past the luminance channel. Underexposing your images in these wavelengths by one stop (- 1EV) is one way to be more secure in retaining the image information.
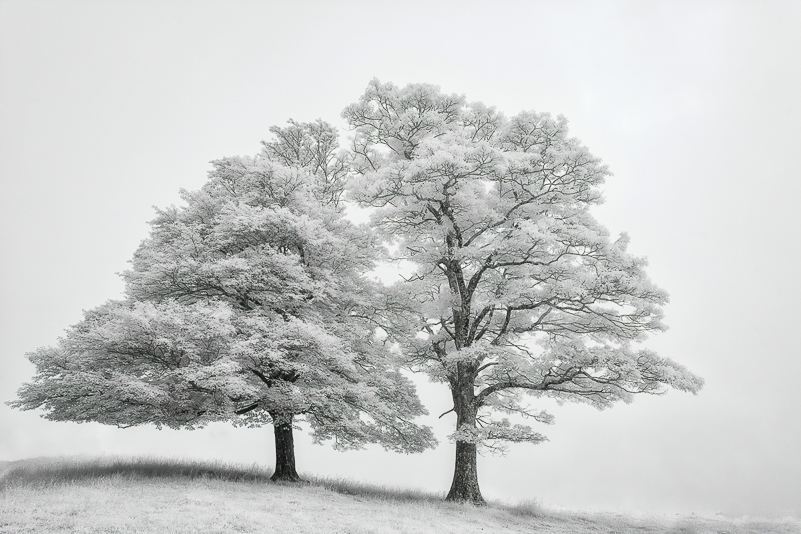
Two Trees in monochrome with 720nm

Two Trees with IR Chrome filter
Custom White Balance (CWB) Is Important
When I began shooting digital images, and even now, I would select a White Balance setting according to the situation and the light. Mostly, I choose Daylight or Cloudy, rarely Auto. The same thing applies and is even more important in infrared. However, instead of choosing one of the standard white balance choices, you want to select Custom White Balance (CWB). That means you need to learn how to set the CWB with your camera – every camera is different in the steps. Without a “good” CWB, your infrared images on the back of your LCD can be hideous (bright pink, overly red, etc.). Most conversion companies give you a CWB to start with. Once you change or add another filter, you’ll need to set a new CWB. The custom WB is different for each wavelength, and it matters – makes a difference. Learn how to set the CWB in your camera. If you need a cheat sheet because you rarely do it, make one and put it in your camera bag. For most wavelengths, I set the custom white balance using green grass. The exception is that for the Chrome filter I use a neutral tone (road, wood fence, or even a gray card).
Some camera brands are more cooperative in giving you a good CWB for infrared (Nikon, Canon and Olympus, typically). However, even within “cooperative” brands, there can be some challenges. Other camera brands require some work in post to get a good starting point for white balance. If you shoot Raw + JPG, and you use Adobe Photoshop or Lightroom, you will have learned or soon will learn that Adobe has other ideas on how your infrared images “should” look. You’ll see the colors shift before your eyes when you open the raw files. It’s annoying, but not impossible to deal with. I create custom color profiles that are applied to the image in Adobe ACR (or Lightroom). This gets the images back in a good place to work with. With jpeg files the white balance is “baked” into the image. It may be that you’ll want to start out shooting both Raw and JPG so you can see where the white balance should be landing in your raw file. Not to worry, there are ways to deal with this issue in post, but setting a good CWB in camera for shooting Is best practice.
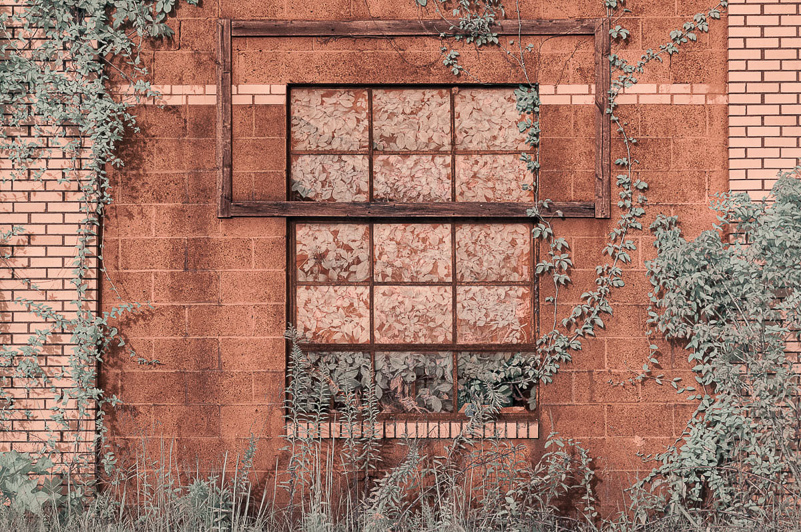
Wabi Sabi beginning with 590nm “raw” image

Wabi Sabi with 590nm after the channel swap
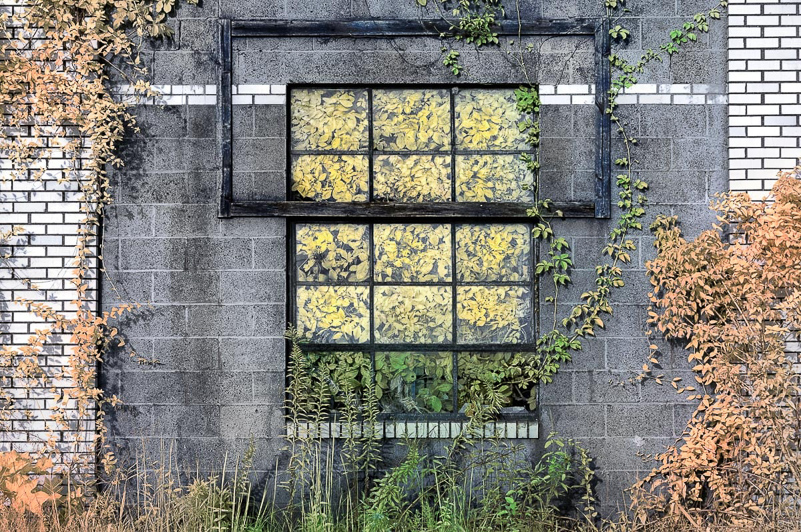
Wabi Sabi with 590nm after channel swap & faux color
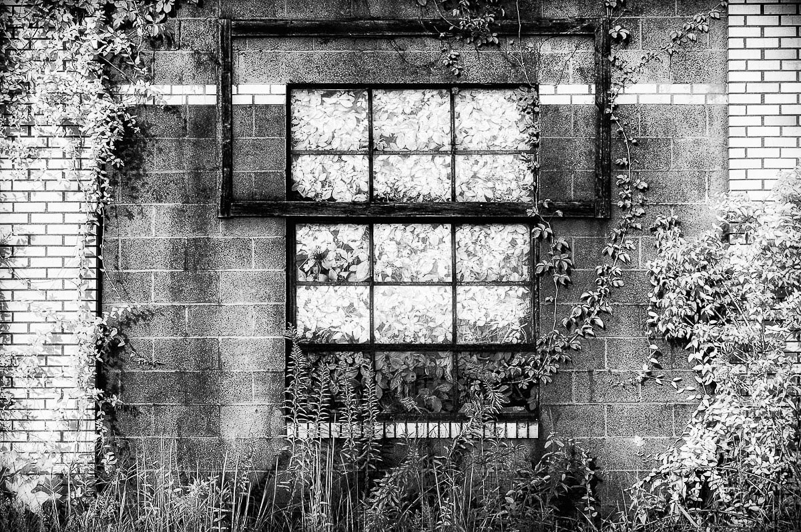
Wabi Sabi with 590nm in monochrome
Composition Always Matters
As amazing and interesting as infrared is for generating images with unique looks, it does not, and never will, excuse or make better images that are sloppy, busy or just plain poor compositions. This is the case for color and infrared. There’s no saving crappy compositions. Well, some, maybe, but most are just a waste of effort.
So, think about your subject(s) and how to arrange the elements in the frame for the most visually appealing image. Make the arrangement communicate to the viewer what made you stop to create the image. I say this all the time – to myself and to all who will listen – “Do it right (or as right as possible) in the field.” There are some things that you simply cannot “fix” in Photoshop. So, why create that extra work for the sake of sloppy? Don’t be lazy or in a hurry. Oftentimes, the change you need to make for a stronger composition is a simple shift in perspective, a step to the right or to the left, or an exposure adjustment. Get your images, infrared or color, as right as they can be while you are in the moment. You’re not a time traveler. You can’t go back and do what you didn’t do.

Pixie Forest on BlueRidge with 590nm

Tree & Fern with 590nm
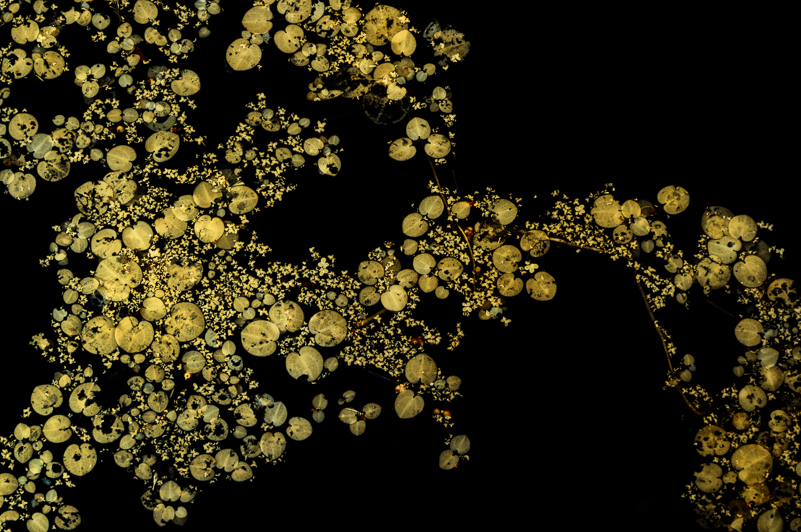
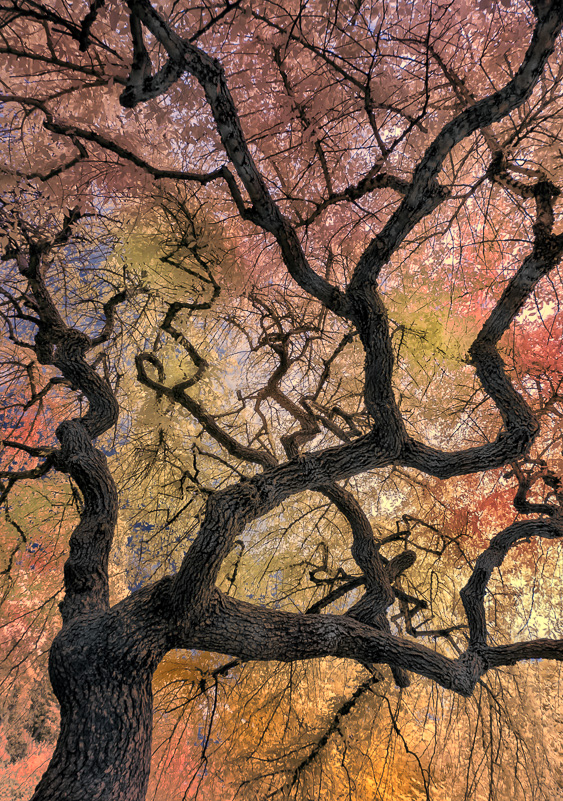
Swamp Gold faux color with 590nm
WHY I LOVE INFRARED
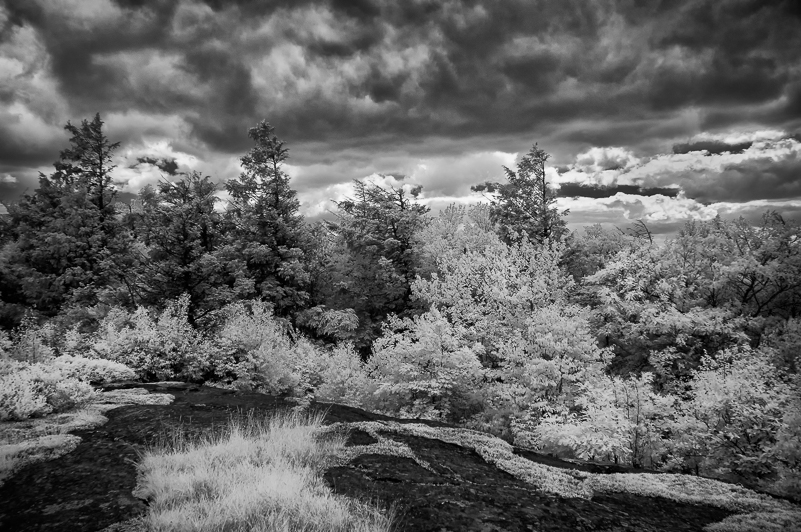
There are a lot of reasons why I Iove infrared, but here are just three. First, it helped me to “see” in black and white. As one enamored with color, it was always a challenge for me to see past it enough to envision the “bones” of the image, the changes in tones and textures. In those early months of shooting with the Canon 20D at 590nm, all I saw on the back of the LCD were images that reminded me of film negatives. They were absent of the color that was before my eyes, I began to see differently. That was major progess for me in learning to see black and white in a world of color. Second, Infrared is an “anytime” form of photography. It loves the light that is high contrast. It is a “middle-of-the-day, high-noon” lover. When the light “sucks” for most color imagery (and that, too, can be debatable), infrared shines. Since I’m not a napper or one fixated on eating regular meals when I’m out shooting, infrared opens the door for me to shoot all day long. There are times when I shoot both color and infrared, and I almost always have both cameras in the field with me. Anything that extends my shooting time and opportunities – and infrared does – is a winner for me. Finally, infrared opens up a whole new world for creative interpretations of subjects in the field and in post. If you want to see the amazing range of possibilities, take a look at this Facebook group, Infrared Photography Group (I’m one of the admins.) It’s absolutely incredible to see where people go with their infrared images. And, one of the primary rules for posts is that the IR wavelength is included. In this way, you can learn what is possible with different conversions.
Blue Ridge vista at 720nm with a little glow

Flat Rock Overlook faux color at 590nm
Flat Rock Overlook monochrome at 590nm
WHAT INFRARED GEAR DO I USE?
As noted earlier, my current primary infrared camera is a Nikon Z6 mirrorless converted to full spectrum. I have a set of nine filters that store in a foldable filter case. This set-up has served me well technically and creatively. My latest update in gear/accessories has been the addition of the Kolari Vision Clip-In Filters that sit above the sensor (also available for Canon, Sony, and Fuji). At first, I was unsure of how this would work for me, since changing wavelength filters involves removing the lens and exposing the sensor to the elements. Gee, that’s what we do when we change lenses, right? So, exercising the same care we ought to use with lens changes makes changing these filters just as easy, and convenient. And, since I am typically shooting at 590nm or 665nm, adding a round filter to the front of my lens allows me to change my wavelength to 720nm or 850nm externally as well. I know. I’ve done it, and it works wonderfully. The only thing I do when I change the wavelength is set a new custom WB. Another convenience factor of these clip-in filters comes in when I do long exposures. I don’t have to stack the filters, so vignetting is not a factor. Not only are these filters convenient, they are space saving. Four filter can fit in one small case, providing savings in space and weight.
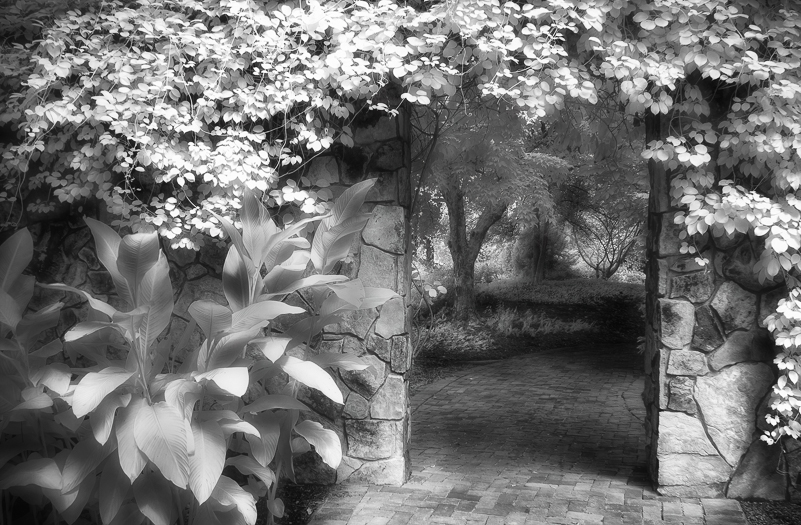
Ginter archway at 590nm in monochrome with glow
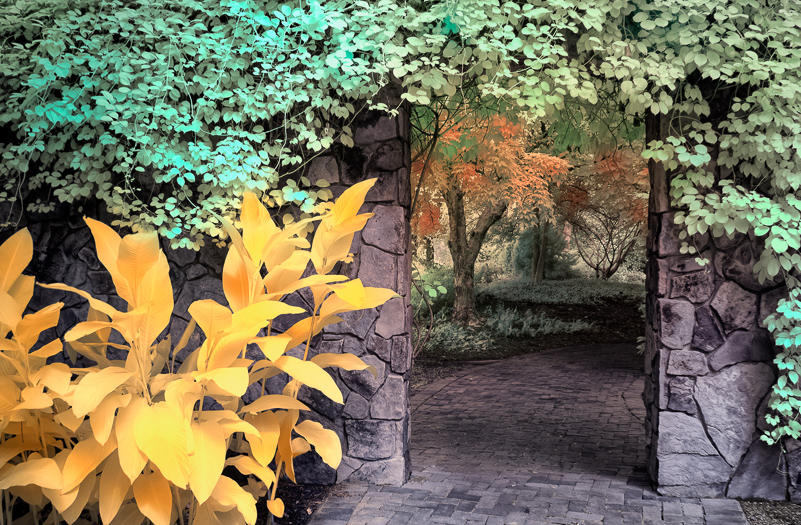
Ginter archway faux color at 590nm
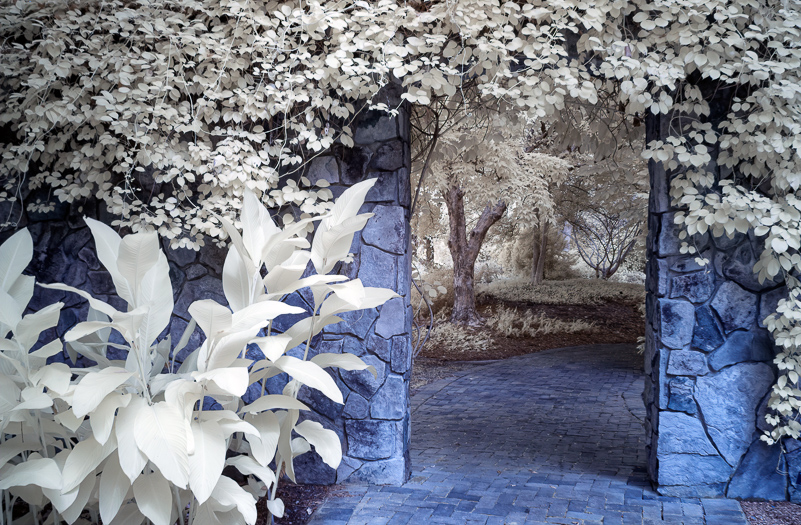
Ginter archway with channel swap at 590nm
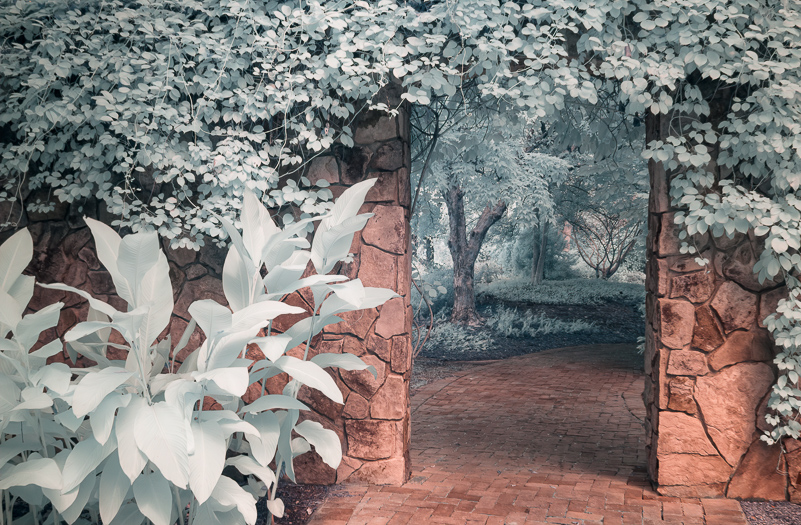
Ginter archway “raw” image at 590nm
MANY WAYS TO INTERPRET
If you haven’t figured this out yet, you will. There are worlds of possibility in the shooting side of infrared, and just as many in the post-processing side. Everyone processes their images in slightly different ways. I have a system that works for me that works for me consistently using Photoshop, Nik Collection, and a channel swap action. For my 720nm and below images, I process “the triplets” (channel swap version, faux color version and the final black/white). For the Chrome images there is minimal processing involved. And the 850nm images are processed primarily using Photoshop and Nik Silver Efex Pro, with a few sidesteps into Nik Color Efex Pro. This is where the rest of the magic happens.
I am always open to learning how others work their infrared images and incorporate what makes sense for my process. I know many photographers skip the faux color processing step because they either don’t like it or simply don’t know how to do it. Those who shoot in the lower wavelengths often move directly into the black/white version because of the lack of knowledge regarding faux color. That’s fine for them, but I can’t help but feel that they are missing out . . . just a little. What I do know is that I can produce strong black/white images from 590nm and 665nm images when I follow my “triplet” system. I’ve seen the difference between the “triplet results” and skipping directly to the black/white. It’s not the same. That said, we all have to do what works for us.
The world of infrared is magical and allows us to create artistic and ethereal images that are highly subjective in interpretation. All photography and image making (beyond the technical) is interpretive. I will always love color. It will always draw me in. But there’s something about infrared that makes all things ordinary otherworldly. There is magic in infrared . . . the art comes from you.

Playtime in Pettigrew in faux color with 590nm
WANT TO LEARN MORE?
If you want to learn more about infrared, I lead photo workshops that are IR-specific and others that are great for both color and infrared, with several loaner cameras available. I also do private mentoring – in person and online. In September, I’m one of eight women photographers and am presenting on infrared at the Hunt’s Photo Women With Vision online conference. If you want to save on a conversion or filters from Kolari Vision Infrared, use promo code “jamiedavidson” at checkout. I have used them for four of my five conversions and much more. They are a great resource on all things infrared and are constantly innovating.

Magnolia Cemetery legend with 850nm
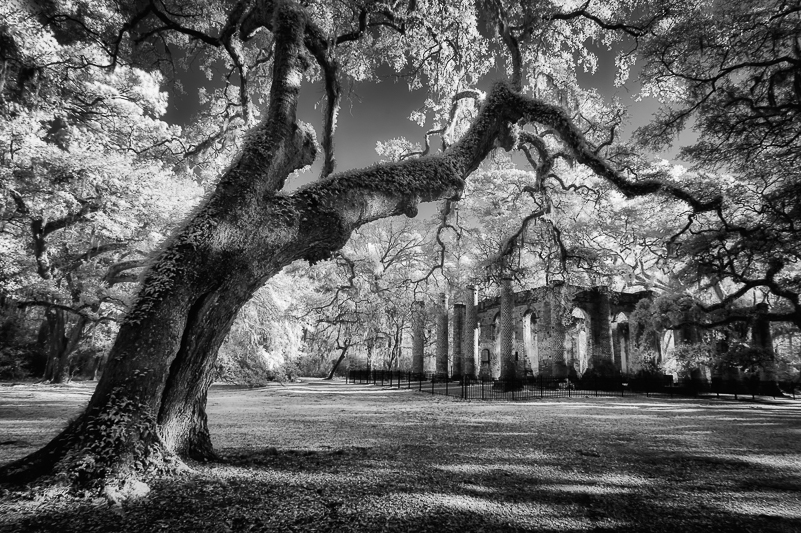
Sheldon Ruins monochrome from 665nm with glow
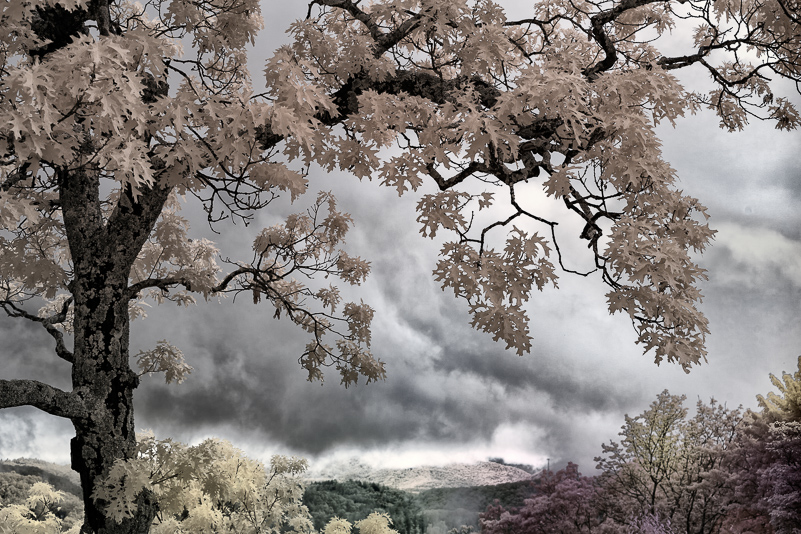
Blue Ridge Overlook faux color with 590nm

Apalachicola at 665nm with faux color & black/white blend

Dahlia close-up with 850nm