The world is but a canvas to our imagination.
– Henry David Thoreau
In the world of art and photography, we see a lot of amazing interpretations, whether on canvas or made with a camera. There are endless tools and ways to interpret any scene or subject. The first part of the process is to have something interesting in front of you. This means that you need to have your eyes and minds wide open and be tuned into noticing what draws your attention – from the big pictures to the small details. Then, be ready to make the choices that will capture what you see and feel. Sometimes, it’s very easy – other times not so much.
You make decisions in photography such as which lens you want to use or what you can do with the lens in your hand as well as what settings you need to have executed your visual plan. Sometimes, you have exactly what you need. Other times, not. I lean more toward choosing what lens to carry based on the situation in general AND how much I am willing to lug, tote or drag around based on the “what if” theory (sometimes called the FOMO – fear of missing out). Oh, no, what if I need the lens or accessories I didn’t bring??? It happens. Oh, well, I have to make what I have with me work or shift my ideas to something that will situationally work better.
Typically, I will have my Nikon 28-300mm lens on the camera for versatility, and I’ll have the Canon 500D close-up lens (diopter) so that I can get closer to subjects in the field. The lens focuses closer than most, and adding the diopter is often enough. Yes, I can “crop it later,” but if I can do the work and get what I want in camera, in the moment, it works better for me. Do I crop? Absolutely! That said, I also almost always have a Lensbaby or two in my bag or pocket along with macro filters. They work so well to express my vision. These simple tools make my load much easier to manage.

It was the shadows that drew me in while visiting a cathedral in Savannah.

Before the transformation to highlight the shadows.
Simple edits in Nik Color Efex Pro – Darken/Lighten Center
A LOOK BEHIND THE CURTAIN
In this blog I thought it might be interesting to take a look at some final images and share the thought process, situations, lessons learned and decisions made to get from the Before to the After (or one version of it). It’s like pulling back the curtain to reveal what happened (the choices I made and why) to take the original images to the version that my imagination led me to create. There are no real secrets. There are methods and techniques and software to help us along the way. The more we learn, the more possibilities we have to match our vision with our images. Here are some of mine.
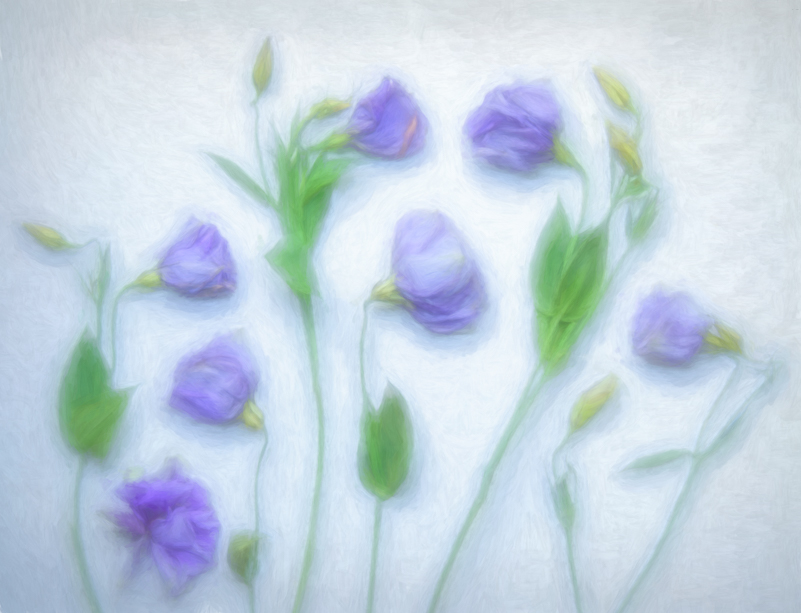
Lisianthus interpreted with Topaz Impression & Textures (Cezanne & Dreamstrokes) and a blurred layer with masking in Topaz
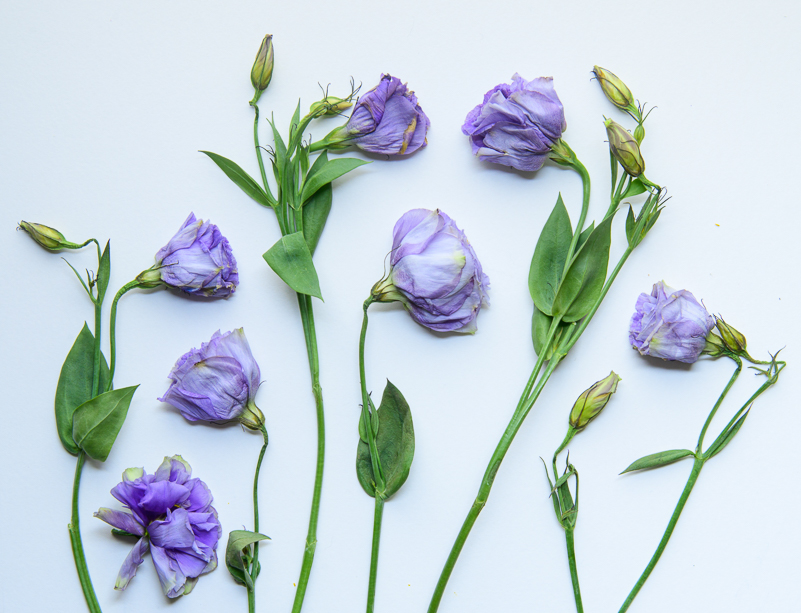
Past peak lisianthus arranged on a piece of white foamcore, over exposed by 2.33 stops
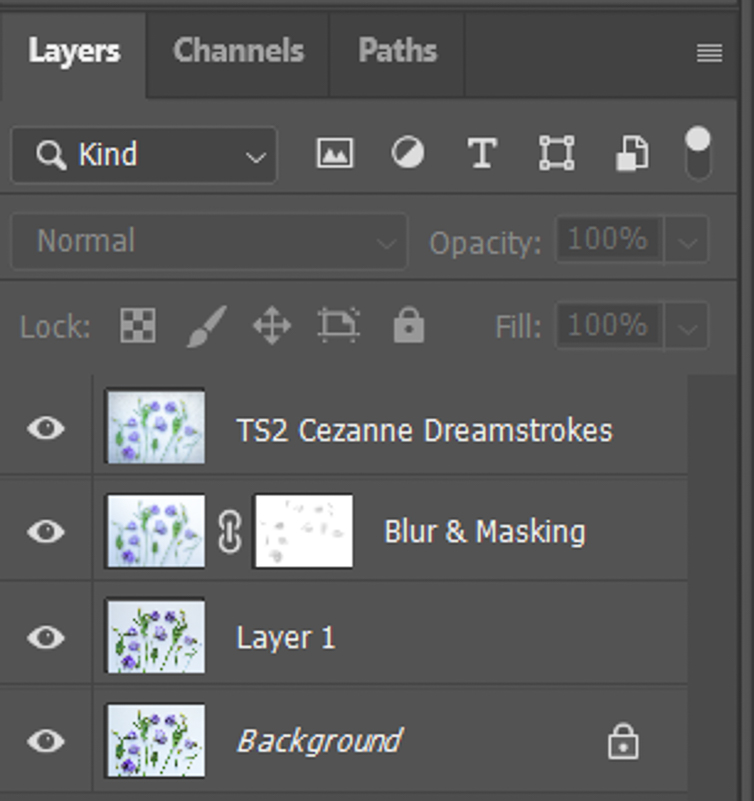
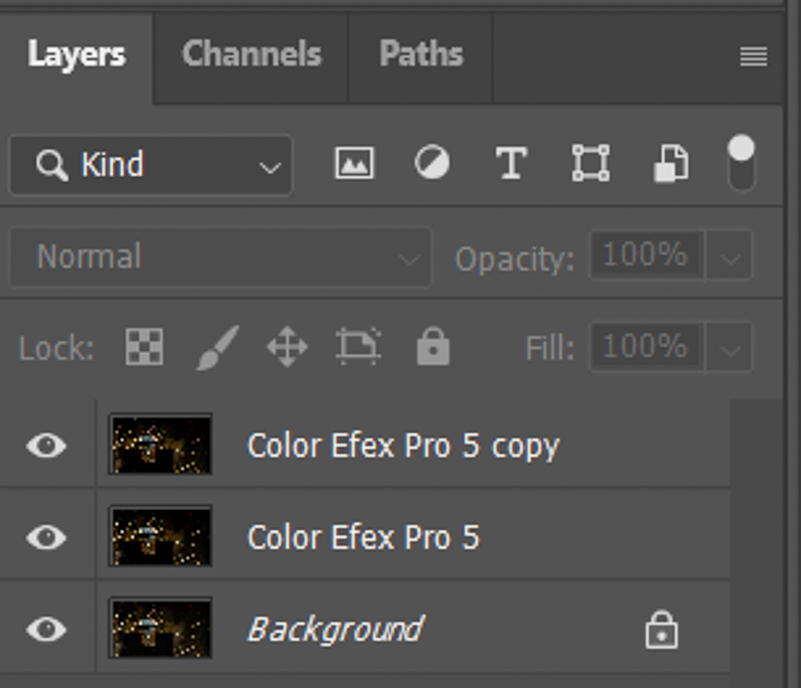
Sharing the layers for final image
FOR THE LOVE OF A COW
I LOVE COWS. Don’t ask me why, but I do. Cows are curious, and perhaps that’s just one reason. So, what made me stop for the image below was that there were lots of cows in this field, and the light was great. This calf was lying down and flies were surrounding it. I was using the Nikon 28-300mm lens and chose f/7.1 to soften the background and also get enough depth of field for the calf. When this calf stuck its tongue out, that was the moment! There was catchlight in its eyes! Those are the reasons I chose this image to process. And, while the background was “okay,” I felt like playing with textures and ended up using two Flypaper Textures (Forest Patina and Belle Epoche). I was also trying to practice a different way to work with textures. (I’m still working on that.)
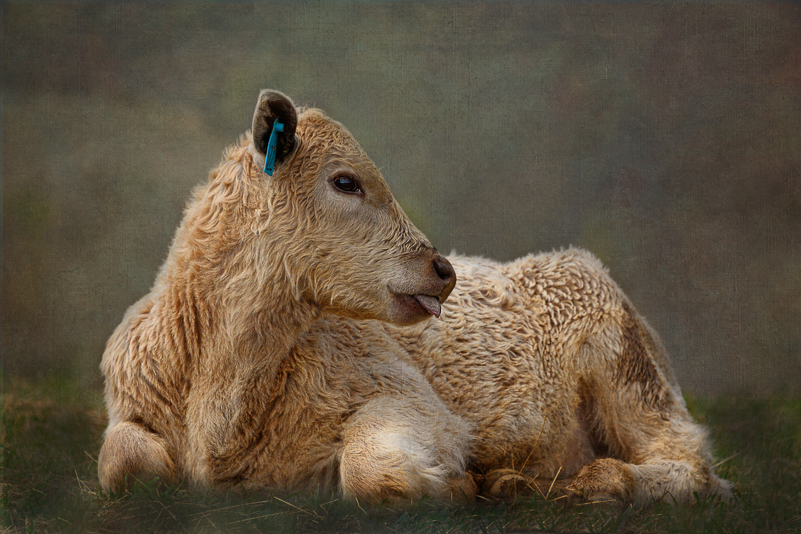
Cow with tongue sticking out and interpreted with textures
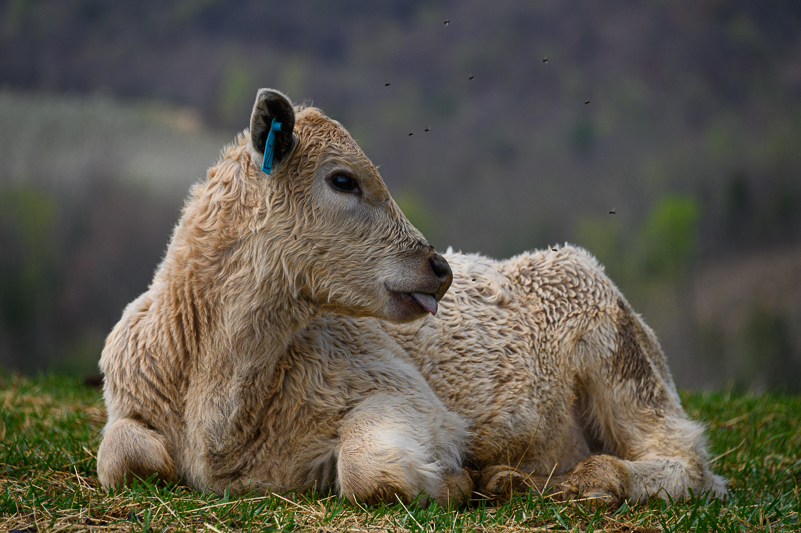
Observe the background and flies in the Before image
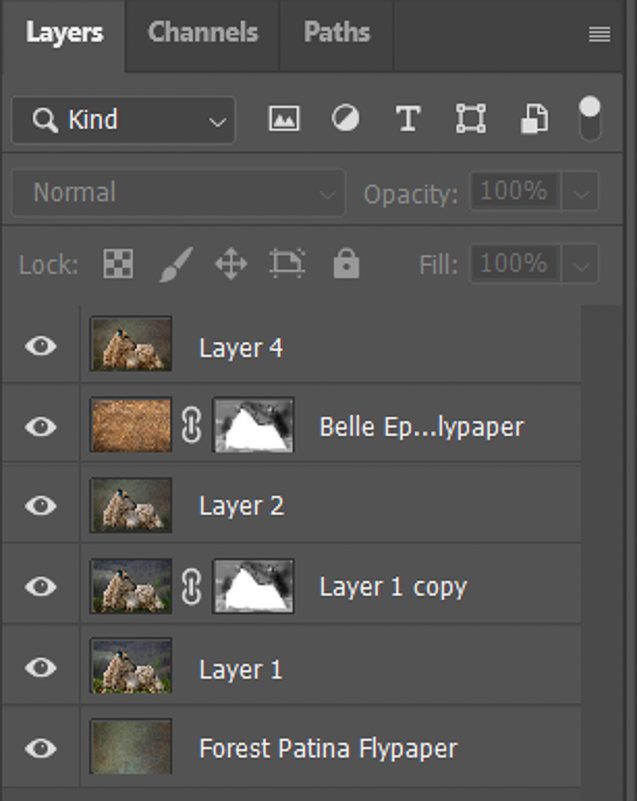
Sharing the Photoshop layers with textures and mask
THE PEEKING RACOON
With the racoon images, it was really about first finding “that tree” on the refuge. No tree, no racoon. After that, it was about being observant and waiting for the light to change. It did – within the space of one minute. The scene went from dappled light to even with moving cloud cover. The expression in the second image had an even cuter gesture. In both images there was catchlight in the eyes. Simple editing with Adobe ACR and Nik Color Efex Pro (detail extractor, primarily) was all that was needed.
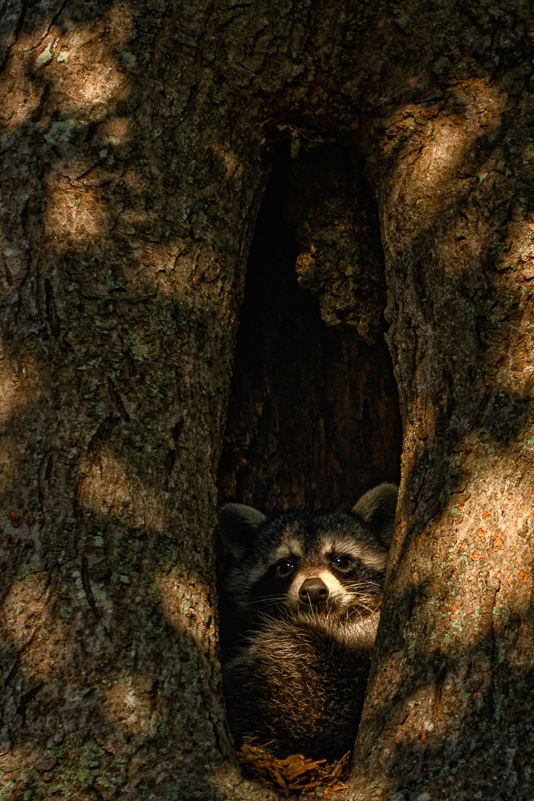
Racoon in tree with dappled light.

Wait one minute for better light.
PAINTING TOOLS
The painting tools image was taken at high noon in a fishing boatyard during a workshop on the Crystal Coast of North Carolina. We were on the last stretch of space leading to our cars and were leaving the location. The assignment was “smaller stories, and this scene definitely was. It was inspired by my love of Wabi Sabi (beauty in imperfection) and my visit to the North Carolina Museum of Art in Raleigh, during which I became enamored with the brush strokes of artists that made up each work (Check out my “Connecting with Brush Strokes” blog post). I loved this scene, and when I chose to process it, I used a texture and blending and masking.
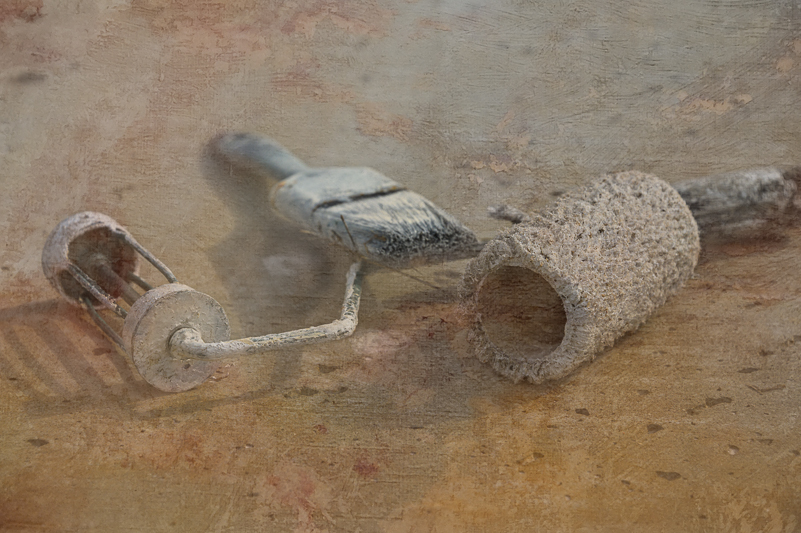
Inspired by painters of art, textures and masking transformed the image.

The raw materials – Wabi Sabi
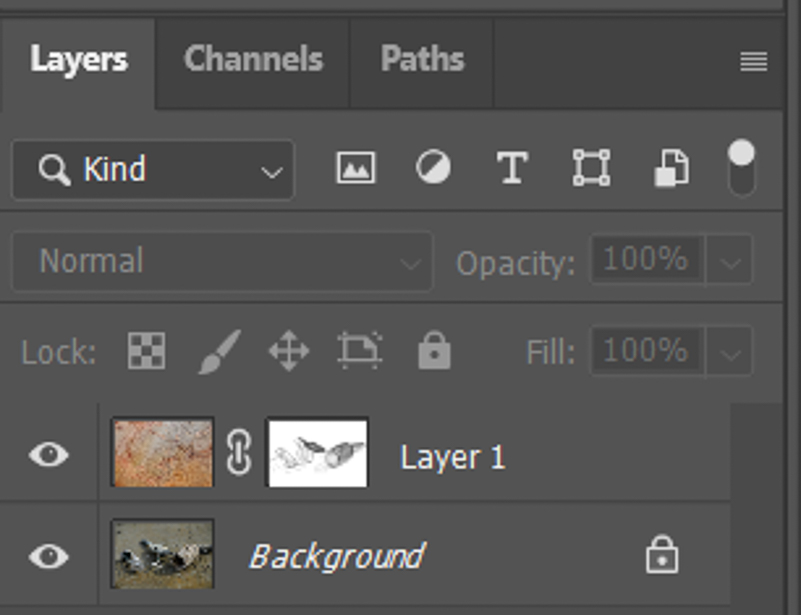
The layers showing texture and masking
VIOLET AND LENSBABY
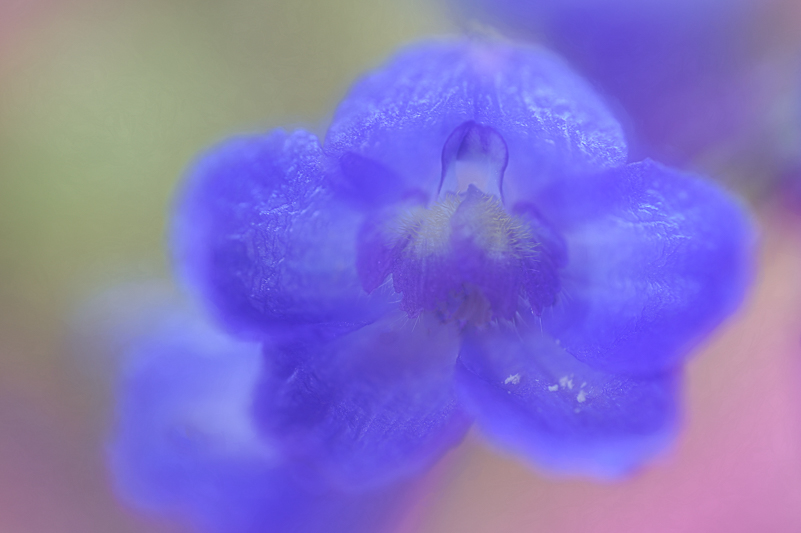
The image I named “Violet Hope” was made with the Lensbaby Sol 45, which has a constant aperture of f/3.5. I don’t believe the image “needed” a texture, but I played with one by Denise Love of 2 Lil’ Owls. The image was made in February at 1:03pm. The light was high, the violet was low. I needed to be on the ground. I also used a diffuser to soften the light on the flower. I’m fairly certain that I also added macro filters. In these situations, you need to be willing to get “down and dirty.” You also have to not care about what people think of you and be prepared for some to ask you if you’re okay.
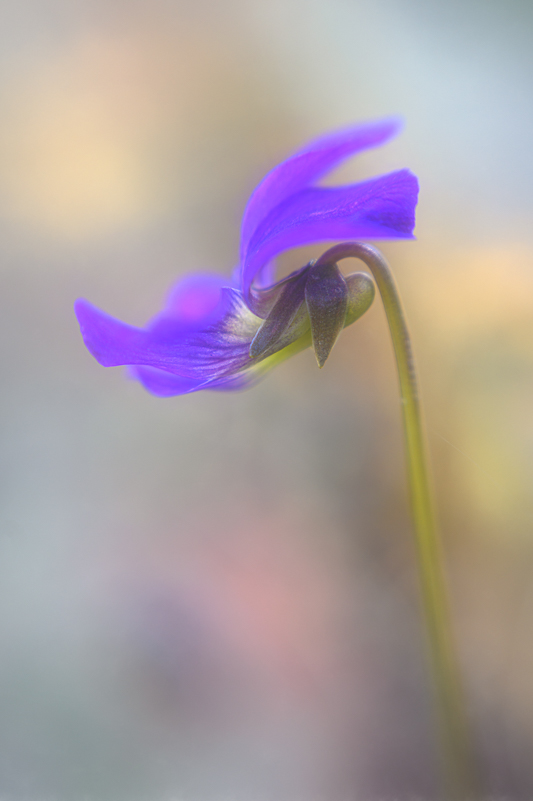
Tiny purple violet with minimal editing
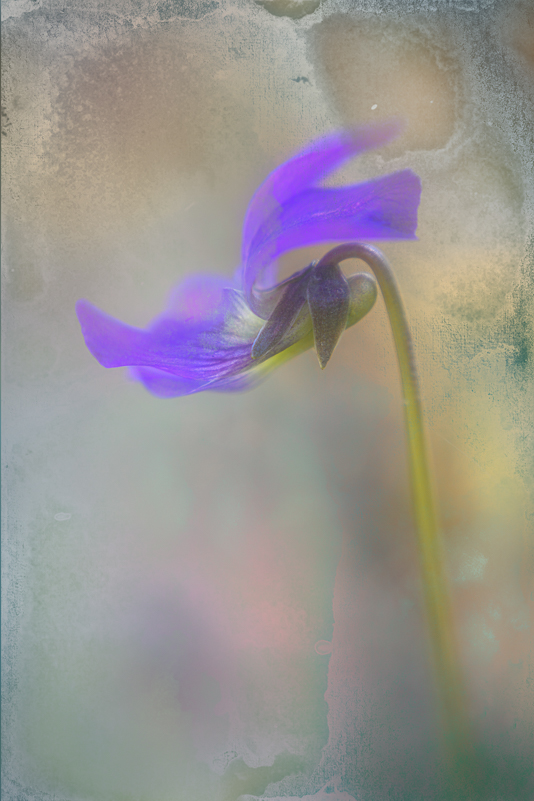
Violet with texture and masking
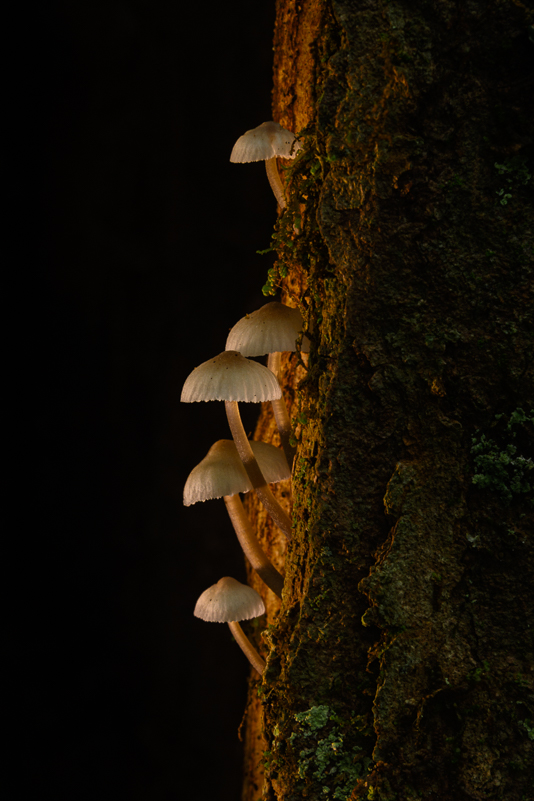
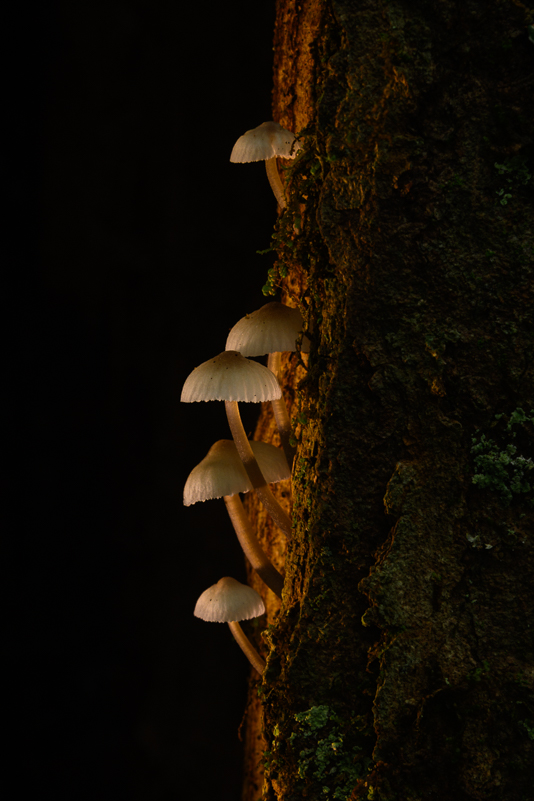
THE MUSHROOM FAMILY
This image was the result of another experiment. I was light painting in the forest at 2 o’clock in the afternoon. First, I was enthralled with this little mushroom family and was excited to find it. Then, I saw an opportunity. I chose the composition and set the camera with the 28-300mm and Canon 500D on the tripod. These mushrooms are TINY. I chose f/16 and worked to be as parallel as possible to them. I underexposed by 2 1/3 stops and then “snoot lighted” with a small flashlight during the 1/4 second exposure. Minimal processing included ACR and Nik Color Efex Pro with detail extractor. I had the idea and the time as well as the perfect subjects. I took advantage of the opportunity presented.
Final image of mushrooms that matches my vision
Mushroom family before Nik Color Efex Pro and Detail Extractor
Keeping it simple in layers
THE CREPE MYRTLE
This is a very recent image taken within the last week while on an assignment to photograph these trees at a nursery. The nursery wanted a variety of images, ranging from more documentary to artistic. It was a very hot and humid time to be photographing. Three times I was chased out of perfect light with storm clouds and fairly torrential rains. The image you see here is unedited. I will edit the image, but I wanted to share an image that works on the raw level. As I have mentioned in a social media post, who knew that the crepe myrtle blooms were so beautiful? I didn’t, but I do now. This image was made with the Nikon 28-300mm lens and the Canon 500D. The light was great, but the wind was not my friend. I was thrilled to make this image.
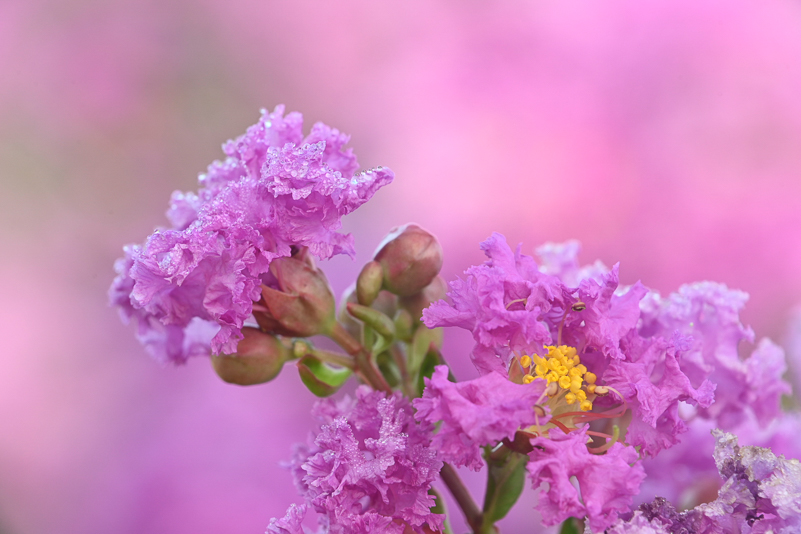
Image with no edits – showing benefits of doing the best work in the field.
FINAL THOUGHTS
The other images posted here share similar scenarios. You’ll see in some the before and after and some showing the Photoshop layer screenshots. The work in post processing for most of these images is fairly simple. In sharing them, I hope to provide you with insight, encouragement and inspiration. I experience these same things when I see the work of others and appreciate when they share the why and how with their audience.
In the Wizard of Oz, the wizard tells Dorothy and the rest of the sojourners to “pay no attention to the man behind the curtain.” He was surrounding himself with smoke and mirrors (and a curtain) and no real power. Not the same for artists who use their vision, mediums and methods to create what is rooted in their imagination. As Henry Ward Beecher once said, “Every artist dips his brush in his own soul, and paints his nature in his pictures.”
Delphinium made on my back patio with Nikon 70-180mm micro and diopters and intentional shallow depth of field, transformed with Topaz Impression – Dreamstrokes
Be not afraid to step out and flex your mind and muscles. Learn what you need or want to know. Experiment and play. Share what you know with others. Be inspired and find ways to encourage others to find their muse(s) and inspiration. Create, and be the artist you are meant to be.

Statuary in Savannah cemetery with shallow depth of field (f/7.1) and minimal editing using Nik Color Efex Pro and Detail Extractor selectively applied.
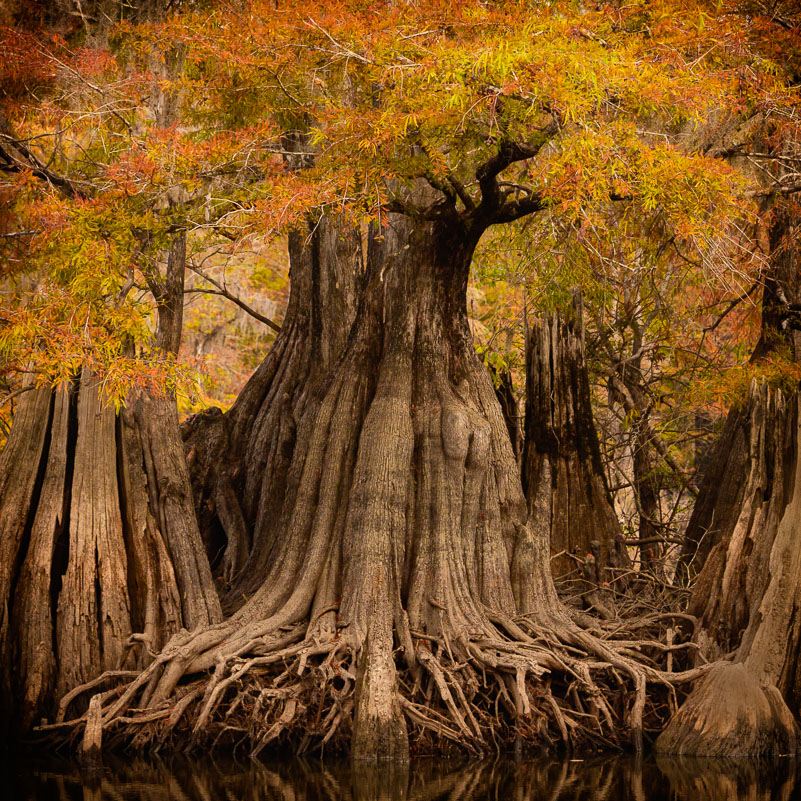
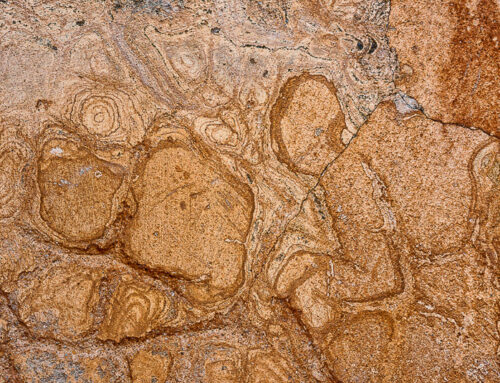
Cypress magic made in the Dead Lakes while on a boat. Square crop in camera. Basic editing along with vignette added.
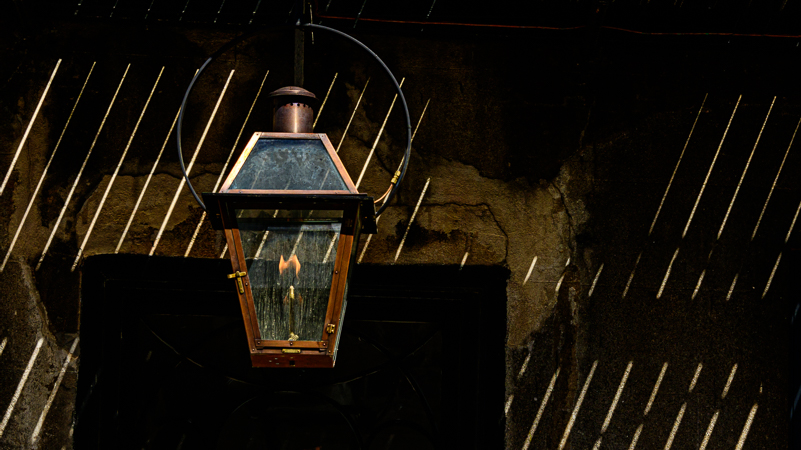
Found on walk through Charleston’s historic district. Format is 16×9 in camera. Basic editing along with Nik Color Efex Pro – Detail Extractor along with lightening the light and part of wall.
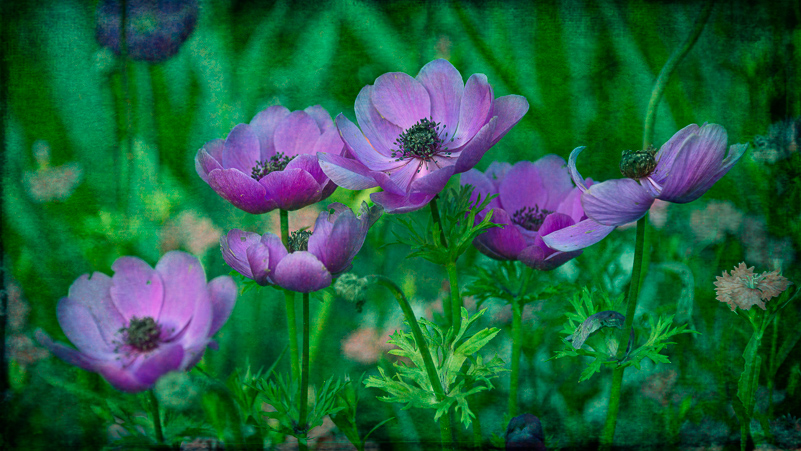
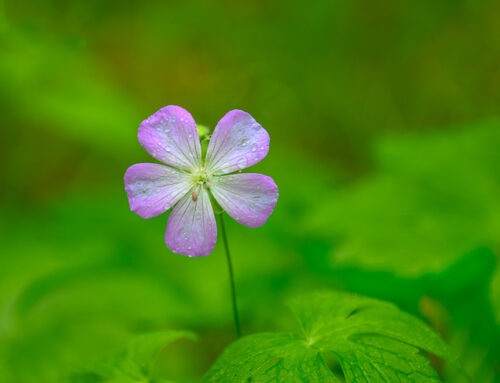
Made with Nikon 28-300mm at 190mm in gardens at f/5.6, selecting center of one flower to be sharp. Interpreted with a 16×9 crop, Topaz Texture (Imperial Ash), French Kiss texture and masking.