Nobody sees a flower really; it is so small. We haven’t time, and to see takes time
– like to have a friend takes time.
– Georgia O’Keeffe
For as long as I can remember, I have loved flowers and gardens and being outside anywhere in nature. When I began my journey as a photographer, I immediately gravitated to flowers. I would bring them home, visit gardens and learn all I could to capture the magic that drew me in. I’m still learning and will always have new things to learn as a visual artist with a camera and computer.
In this post you will learn about photographing flowers and gardens, but know that it is not an exhaustive study. I share my approaches, ideas and tips for you to consider and try on your own. If you’d like to join me in the field on a workshop, learn more here. Meanwhile, bear with me as I time travel to the flowers of my childhood, which began my love affair with flowers. They continue to be my “Calgon” and one of my “soul feeders,” as every aspect of photography has become.
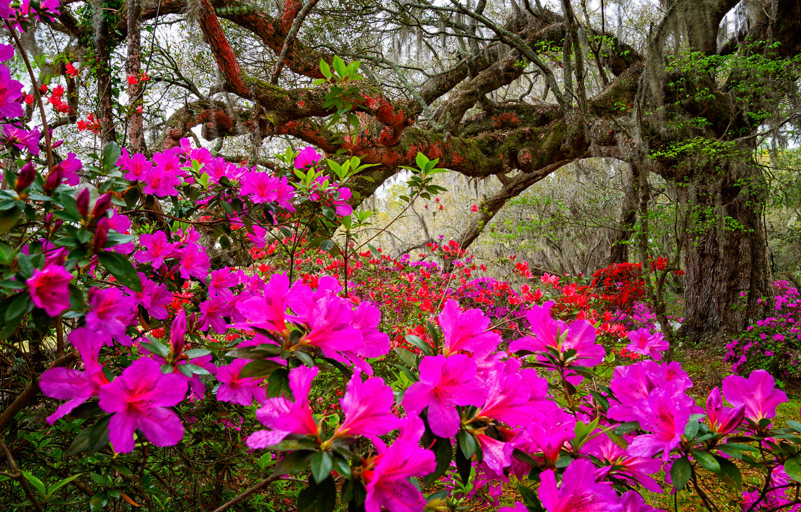
Magnolia Plantation and Gardens in Charleston, SC, is famous for its live oak alley lined with azaleas. If you visit in Spring, you must photograph this scene. It tells a story of time and place.
FLOWER LOVE ROOTS
My love of flowers began in childhood with carnations, lilacs, marigolds and azaleas. One of our neighbors was a flower grower of carnations. At the back of our yard and just beyond two sets of greenhouses, he had a huge throw-away pile of “not-good-enough-for-market” carnations. It was a constant source for bouquets to give our mom and teachers. I still remember the smell of carnations and the fun we had picking through the pile.
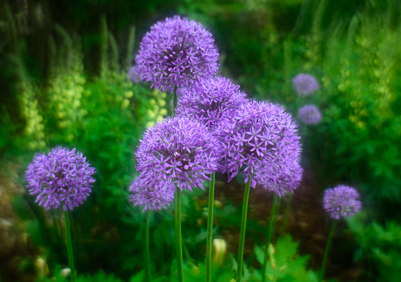
Then, those wonderful lilacs! Our next-door neighbor, “Unkie Al,” had a line of lilac bushes along his side yard. I remember that profusion of purple and sweet fragrance. Each May we gathered small bouquets, wrapped in wet paper towels and aluminum foil to give our teachers (and mom). Each bouquet brightened four teachers’ day and ours for being able to share the beauty from our almost backyard.
The marigolds have a different reason for remembering them with fondness. They were always growing in the front yard because my father planted them. He may have liked the flowers, but I seem to recall that he planted them to help keep the mosquitos away.
The last flower of my childhood is the azalea. My grandparents’ house was surrounded with them in many colors– pink, purple, white, salmon and shades in between. My grandmother loved her azaleas. Almost all pictures of our visits there were taken on the front stoop or in front of those azaleas. She lived to be 95, and whenever I see azaleas I think of her.
When my mother was growing up, her grandmother grew peonies. Only after I brought a huge bouquet from Pharsalia for Mother’s Day did I learn they were her favorite flower. I fell in love with them, too. Peonies and dahlias tie for first place on my favorites. Good thing they grow in different seasons.
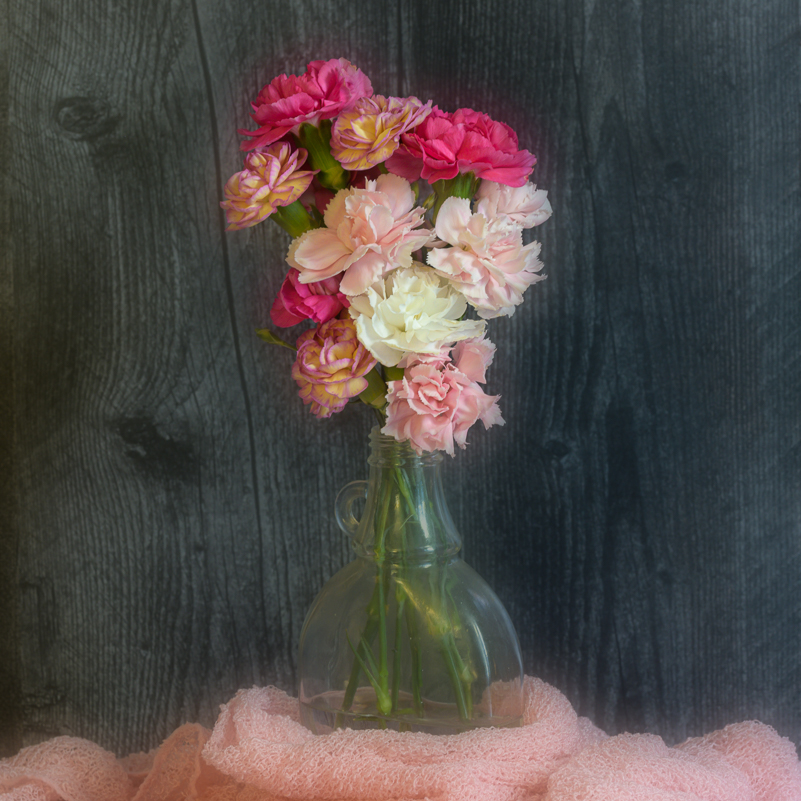
Carnation Still Life that brings back memories of the “not-for-market” throwaway we picked through in my childhood. This image is a bit more refined than that pile.

Spring tulips in soft light and focus. Sometimes capturing an image without sharp details works for highlighting the colors and shapes in a portion of the garden.
OVERVIEW OF GARDENS
Most gardens fit in one of these categories, with variations based on location, space, historical contest and the designer. In the Formal Garden, you recognize a great deal of planning from the system of paths and steps, statuary and other elements. Natural Gardens share a sense of spontaneity, such as Japanese gardens, rock, grass or woodland gardens. In Water Gardens, water plays a strong part in design, plants within (water lilies, lotus and so on), ponds and structures (fountains and waterfalls). Home Gardens vary in style according to the one who cultivates it. They typically reflect the personality of the gardener and may include elements from each of the above. My garden is eclectic and loosely arranged.
Gardens are designed to be explored and experienced, with or without a camera. That experience goes beyond than visual. It is sensual in every way – smells wafting through the air, sounds of birds and garden critters singing and rustling through trees and bushes. We feel the breezes and warmth from sunlight that allow us to close our eyes and simply be present. We need these therapeutic moments in nature, in and out of gardens.
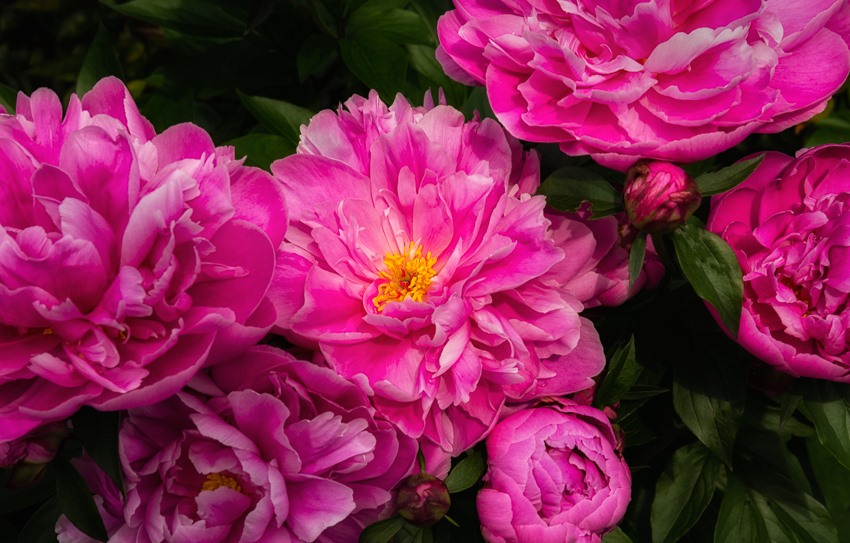
Beautiful peonies from Pharsalia, an 1814 plantation with gardens all around the property. Every Spring these bloom in many different varieties and color. It’s one of my favorite places to visit and photograph. Pharsalia offers mini workshops and sells flowers at the Nelson County Farmers Cooperative in Nellysford, VA. It’s also a fabulous wedding and event venue. Note that it is private property and only open for visitors by appointment.
OVERVIEW OF GARDENS
Most gardens fit in one of these categories, with variations based on location, space, historical contest and the designer. In the Formal Garden, you recognize a great deal of planning from the system of paths and steps, statuary and other elements. Natural Gardens share a sense of spontaneity, such as Japanese gardens, rock, grass or woodland gardens. In Water Gardens, water plays a strong part in design, plants within (water lilies, lotus and so on), ponds and structures (fountains and waterfalls). Home Gardens vary in style according to the one who cultivates it. They typically reflect the personality of the gardener and may include elements from each of the above. My garden is eclectic and loosely arranged.
Gardens are designed to be explored and experienced, with or without a camera. That experience goes beyond than visual. It is sensual in every way – smells wafting through the air, sounds of birds and garden critters singing and rustling through trees and bushes. We feel the breezes and warmth from sunlight that allow us to close our eyes and simply be present. We need these therapeutic moments in nature, in and out of gardens.
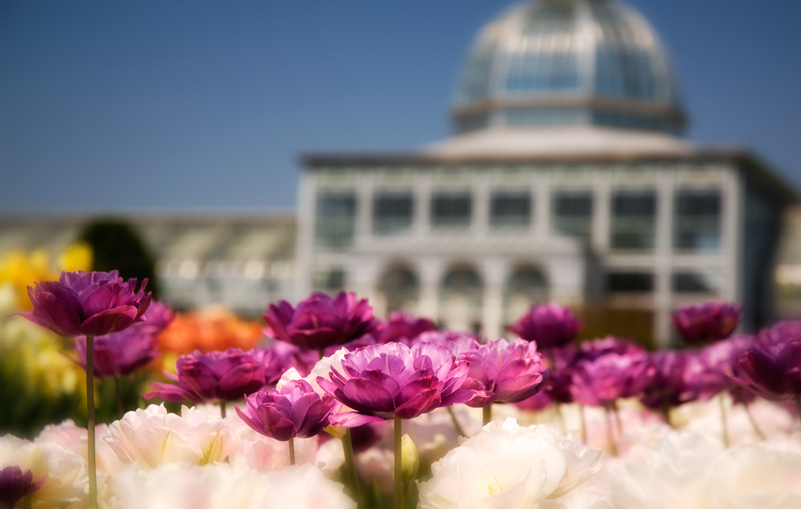
Lewis Ginter Botanical Garden in Richmond, VA, is open year round. Flowers rotate through every season. A wonderful orchid collection lives in the Conservatory along with a seasonal exhibit on the other side. A photographers wonderland.

Agecroft Hall & Gardens in Richmond, VA, features a Tudor mansion and gardens and reflects the order and opulence of English gardens. The sunken garden explodes with annuals, and a fragrance garden blooms with Elizabethan aromatics. Walking the grounds feel like a stroll back in time.
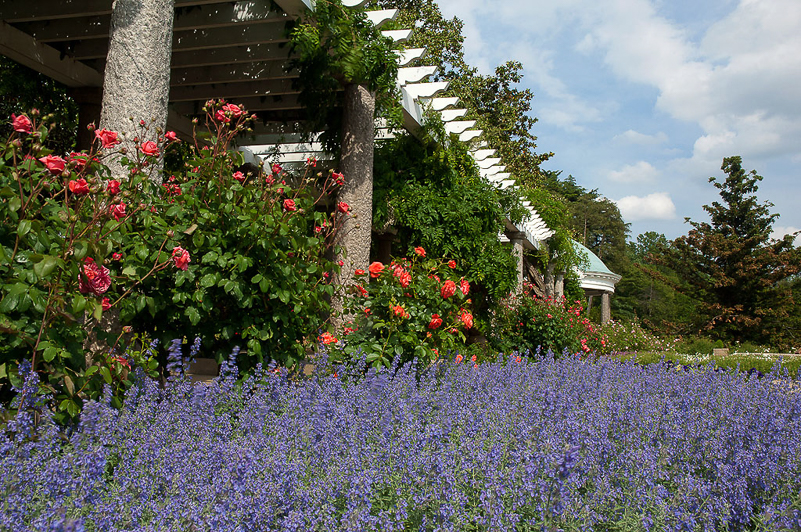
Maymont Park in Richmond, VA, is 100-acre Victorian country estate and public park filled with magnificent gardens, including the Italian Garden, Japanese Garden and a number of specialty gardens. Trees and shrubs fill the rolling landscape. It never disappoints.
PHOTOGRAPHING THE GARDENS – WHERE DO YOU START?
Start with the big picture and work your way inward. You want to capture a sense of place, including what makes each garden unique. Without the bigger story of place, every smaller story and macro images of flowers and plants could be taken anywhere, in any garden or even on the side of the road. If you do the “single-bloom race”, you might kick yourself later for not spending time on broader views. Allow yourself time to absorb the scene – without your camera. Take it all in before you set up. After you work the big picture with images that capture part of the garden’s personality, begin to isolate and photograph the smaller stories, the intimate landscapes.
Tune in to the many stories told in a single scene and single blooms. Ask yourself, “Is there more?” (There always is.) Slow down and be present in the moment and the place. Capture beauty in the big and small. Focus on interesting elements – bones of a tree, flow of petals, textures and shapes of leaves, patterns, edges, and critters among the blooms. Work your subjects until you can say, “There’s nothing left.” There may be, but at least you’ve stayed long enough to see more than if you raced to a certain spot or bloom. Exchange only passing glances and you miss the beauty along the way. To see, you must keep your eyes and mind wide open. You must be willing to stop and stay a while.
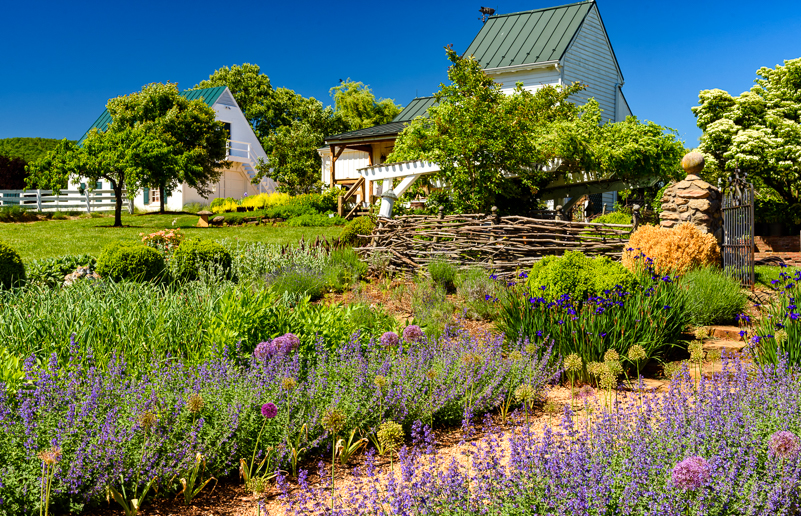
Start with a broad view. Here is a scene that reflect a sense of place at Pharsalia.
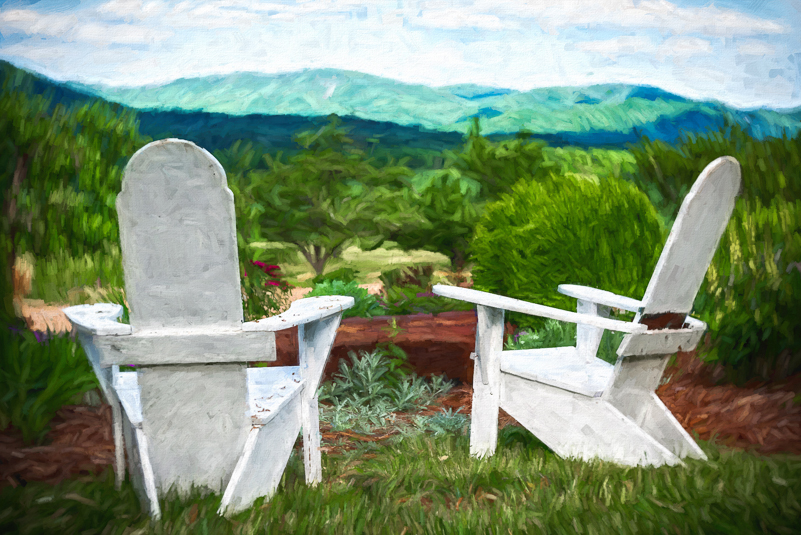
Look for the smaller stories. These chairs are purposefully placed for a mountain view.
Walk the grounds with your “noticers” on and tune in to the flower stories.
FINDING COMPOSITIONS THAT COMPEL YOU AND THE VIEWER
Finding compositions that work can be, at times, challenging. Whenever you stop in a garden (or anywhere, really), ask yourself, “What made me stop?” On a visit to Lewis Ginter Botanical Garden, it was an awesome backlit Japanese maple that highlighted the curvy bones, framed in color and light. I had to stop. Whenever you stop, ask and answer that question. Even say it out loud. This will give you a path and direction to follow. If the final image doesn’t “work,” stay longer. Work it.
Find and Define Your Subject. This makes a big difference. Slowing down and being intentional adds to your success. My process is: Notice (What made me stop?), Visualize (How do I want the subject to look?), Execute (Do the work and not in 1-2 frames), Experiment (Take your time, work the angles and framing.), and Explore (Don’t leave before the “party” starts. Stay with your subjects.). The longer I stay, the more I see. It takes time to settle in, and one or two shots are like “shake hands and walk away”.
Be patient, and consider the tools that will bring your vision to life? Is it your wide angle, telephoto or macro lens? How close do you need to get? Can you? Is the lighting just right, or do you need a diffuser, reflector or flash? Is it possible that a little patience will bring another passing cloud to even the lighting? If so, be patient. It is worth the wait and worth the effort. Stay with your subject – large or small – until you see the scene as you imagined when you were first compelled to stop.
Use design elements to strengthen compositions. We use these to make our subject shine. Look for lines, shapes, patterns, textures, color and flow for clarity and emotional impact. Fill the frame with a subject, or not. Including more of the environment and selecting the orientation best for the subject are part of the process. If we must tell the viewer what they should see, we haven’t done our jobs.
Remove all distractions. Anything that takes away the impact of “the star” needs to go away. How is the viewer led through the image? Is it a busy composition? Is the background too busy? Do bright or dark areas draw the eye away from the subject? Are things poking into the frame? Is the image blurry or focus misplaced? We must work to express our subjects clearly. Confusion misses the mark – pay attention to details.
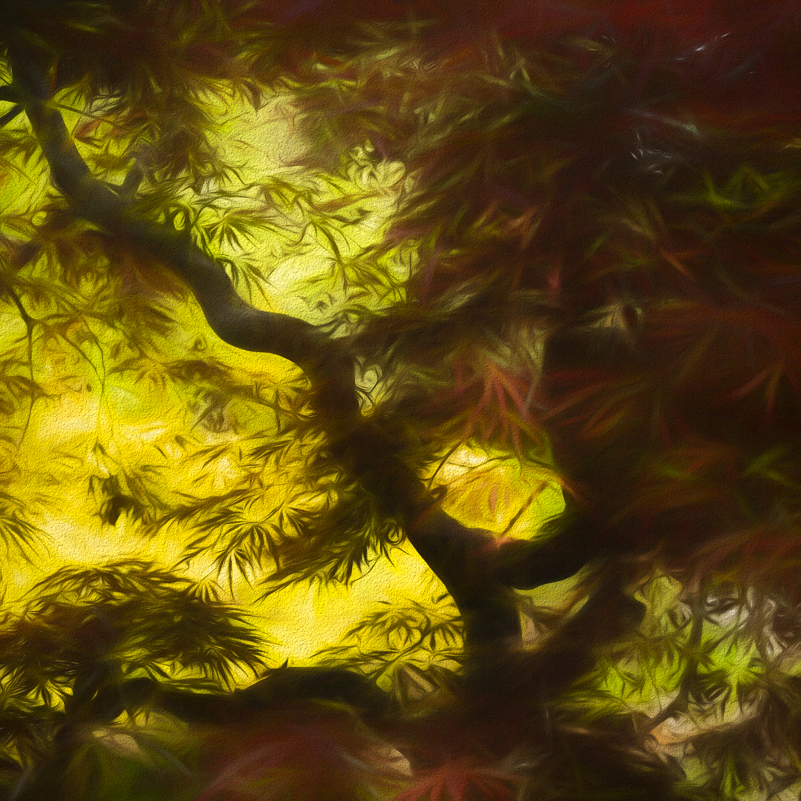
Backlighting and great bones and color worked together to create this interpretation of the Japanese Maple at Lewis Ginter Botanical Garden. Choosing to crop to square emphasizes the features more effectively for my vision.

Backlit flowering trees are rendered more beautiful with the help of a flash. The flash also helps when spring breezes are blowing to stop action.
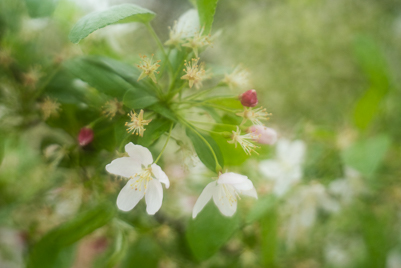
This images is a blend of two, one soft and one with sharp focus. Loved the soft focus but felt that a bloom needed to be featured,
BUY THE LENS AND TOOLS YOU NEED – INVEST WISELY
If you are “in love” with flowers and find yourself always wanting to get closer to capture intimate details, buy the macro lens. Extension tubes and supplemental close-up lenses (Canon 500D) get you even closer and can also be used with most of your other lenses.
A few more essentials for your photography in general and for the gardens include: A sturdy tripod and ballhead with Arca Swiss Mount. Be sure it is tall enough for eye-level shots and has independent legs that allow you to get low or flat to the ground. INVEST in a good tripod up-front. Buy once and well. Do your research, and visit your local camera store if you’re lucky enough to have one. I do – ASAP Photo & Camera in Greenville, NC. Pick up a remote shutter release (cabled or wireless). This keeps camera movement at bay when you “mash the button” and gives you sharper images.
Lighting Tools: Diffuser/Reflector Sets, Flashlights & External Flash. Managing light is part of the process. I prefer working with ambient light over flash, but that’s a personal choice. I use a 22” 5-in-1 diffuser/reflector set. It is large enough for most subjects and a good portion of background and removes contrasty shadows all day long. I carry a 12” silver/gold reflector to bounce light selectively onto subjects. These, along with a small flashlight, allow me to control the light on subjects. An external flash is another good option to light your subjects. An off-camera cord gets the flash off the hot shoe so you can direct light. It has a learning curve to master, but definitely works.

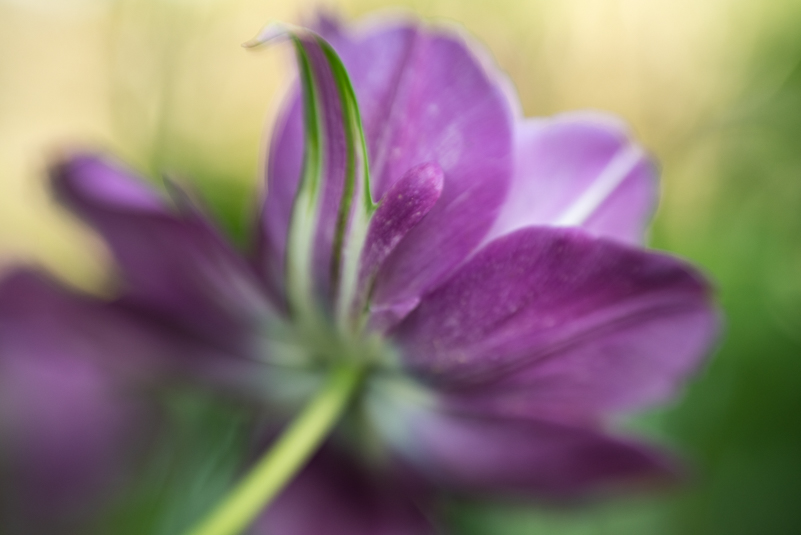
Shooting with my Nikon 70-180mm micro lens allows me to fill the frame with this beautiful Clematis.

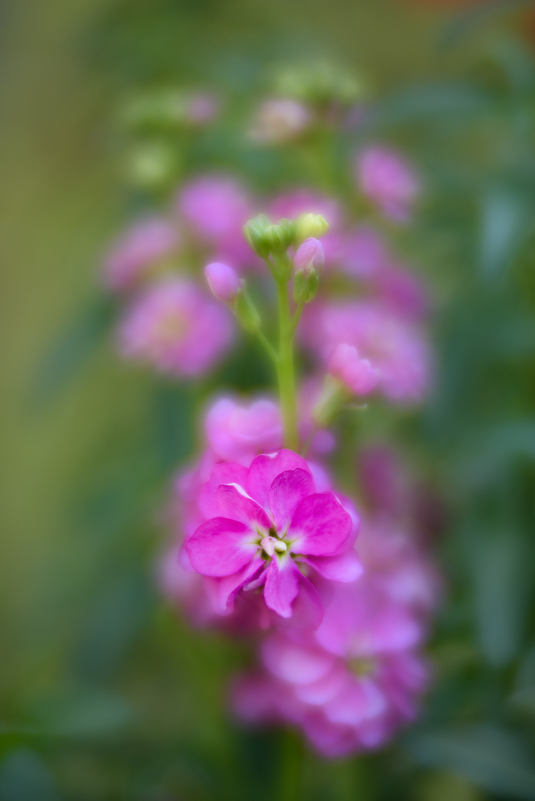
Following the flow of this pink peony petals and choosing softer focus expresses what drew me in.

Moving in close with macro lens highlights this dahlia’s freshness and the purple on petal edges.
CREATIVE TECHNIQUES IN CAMERA AND LENSBABY
Here’s where the fun begins (or continues).There are endless ways to capture images creatively in the field. Among the most common are selective focus, shooting through, multiple exposures, zooms and spins, and motion blurs. These can be done with any lens and are only limited to what your camera will allow and your imagination. You are the one who creates the magic in the gardens.
Selective Focus – When you choose a wide aperture, the slice of focus you achieve is small and typically gives you soft backgrounds. Get super close to a flower or even closer to the petals, your depth of field decreases even more. This technique allows you to be “selective” in what part of your subject is sharp while the remainder of image is in soft focus. It’s great for flowers and many other objects.
When you use the Shooting Through technique, you select your subject, making sure it is sharp where it needs to be, but you’re also moving the lens closer to an object (leaves, flowers) than the lens can focus (violating the minimum focusing distance). This allows you to create a dreamy effect in camera and also remove distractions with soft focus colors.
In camera multiple exposures allow you to create a wide variety of images and looks. Part of the process is limited to what your camera can do (some allow two or three frames, others up to ten). You select the number of frames and how you move the camera in each frame to create your image. Direction and quantity of each frame work together. Results vary, so you have to experiment to see what works best for your subject and vision.
Zooms and Spins take practice, but basically you’re zooming or spinning the camera during the exposure. Slower shutter speeds work better. If your lens has a tripod collar, you have more control with spins. You can handhold if you need to. This works with large and small subjects. I typically choose a small aperture (f/11-f/22) and low ISO (100-200) to get the shutter speed I need. Experiment and play. Sometimes ¼ second is enough; other times, longer works better. It depends on the light and your creative intention. You won’t know what worked best until you see images on the computer.
Motion Blurs – This technique (ICM – intentional camera movement) creates abstract, interpretive images. Almost nothing is sharp. It’s about color, movement and contrast. Subjects that work well in gardens are trees with separation and varied colors or tones. It also works on swaths of flowers and bunches of blooms. Slow your shutter speed and move the camera during the exposure. Vary direction and speed of movement for different effects. Some images with this technique are simply magical.
Lensbaby Lenses and Optics – One of my favorite creative tools is a Lensbaby. The beauty of Lensbaby is that you can create wonderful and ethereal images that require minimal post processing. While a little challenging at first – all manual focus – it’s easy to get hooked on the creative possibilities. To learn more, visit Lensbaby and check out my article, “Lensbaby Magic and Flower Photography”. My favorites are the Velvets and the Composer Pro. They’re excellent for flowers and gardens. For macro lovers, I recommend adding the macro kit (close-up filters) to your bag to get even closer.
Selective focus and shallow depth of field create a sense of mystery and wonder with this tulip image.

Shooting through another bloom close to the lens helped hide a stem that didn’t add to the image.
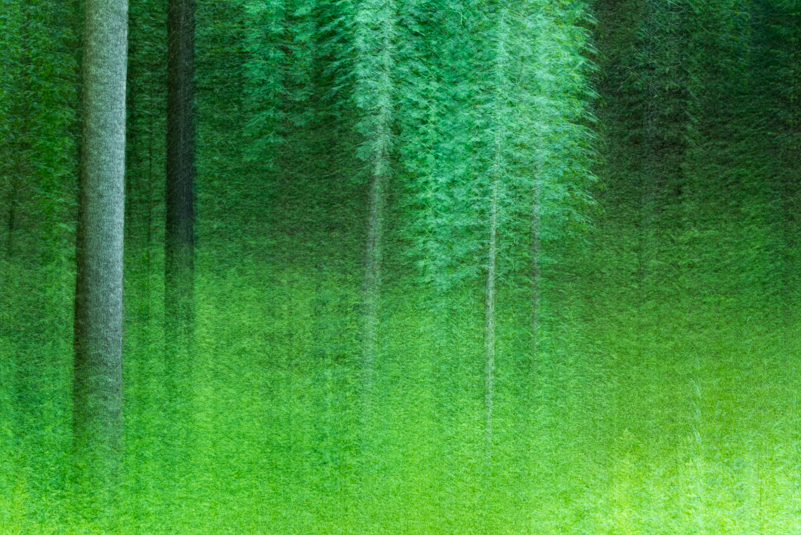
Multiple exposures in a vertical direction create fantasy forests that emphasize colors and patterns.
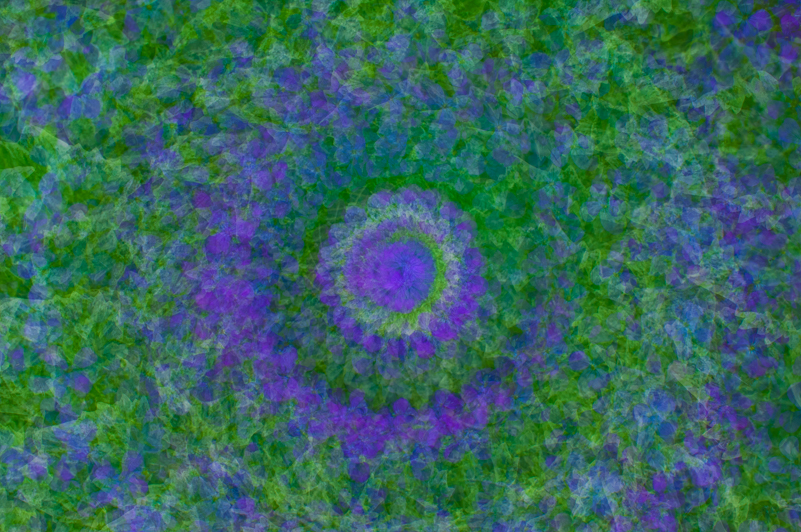
With the right subject, multiple exposures and spinning lens will give you a kaleidoscope look.

Zooming and spinning the lens through the exposure creates unique interpretations.
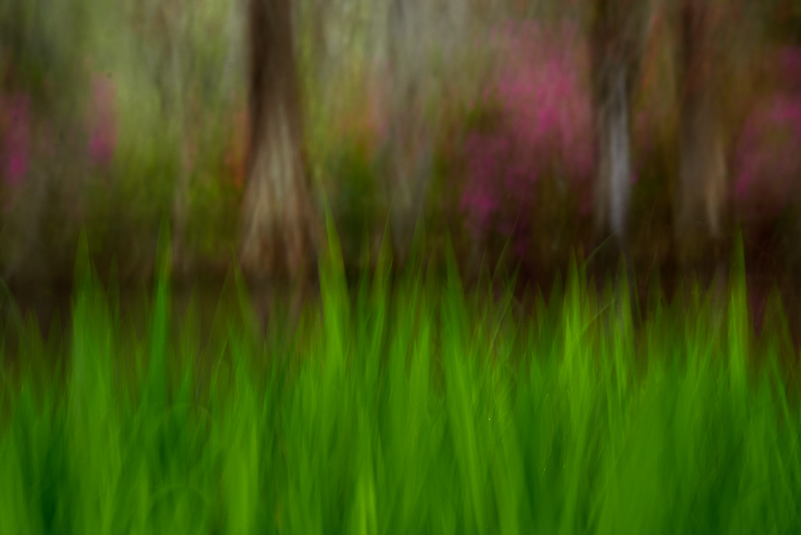
Motion blur of azaleas and cypress trees at Magnolia Plantation in Charleston, SC.
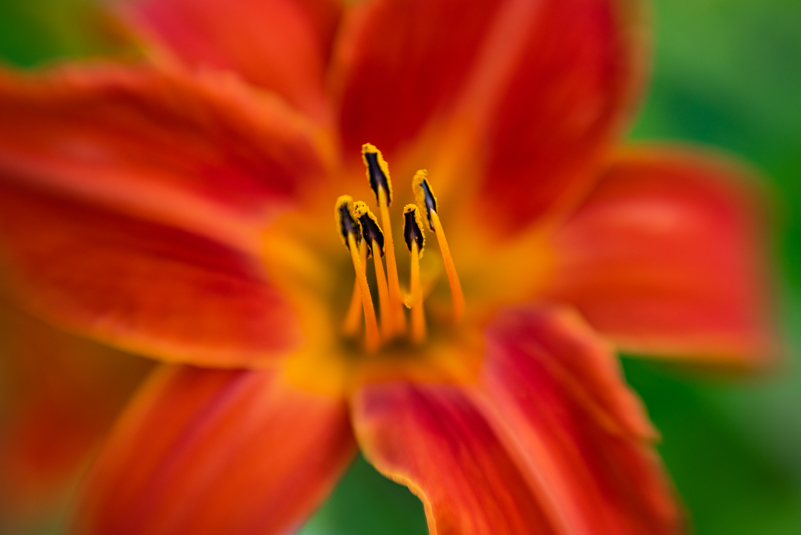
Orange daylily from Grace Gardens in Penn Yan, NY, with Lensbaby Velvet 56.
TOOLS YOU BRING BUT CANNOT CARRY
The greatest tools you have are priceless: Imagination and Creativity. Everyone is creative. The difference is your vision. Other tools require awareness and practice: An Open Mind to see and respond to subjects, Patience, Persistence and a Willingness to “Try and Fail” (Learn from our mistakes.) Develop an understanding of exposure and composition. And please, learn your camera. “Woops” should not be the standard response as you search for the right button, especially when you’ve had the camera for a while.
Please STOP saying that you’ll “fix it in post.” That’s just lazy and sloppy. Avoid reconstructive surgery in post processing. Are you a “one and done” shooter or an explorer? If you flit from one thing to the next and never stay more than a few frames, change that. Stay with each subject for at least ten frames. Challenge yourself to find at least five unique images. Slow down, be intentional, and do the work.
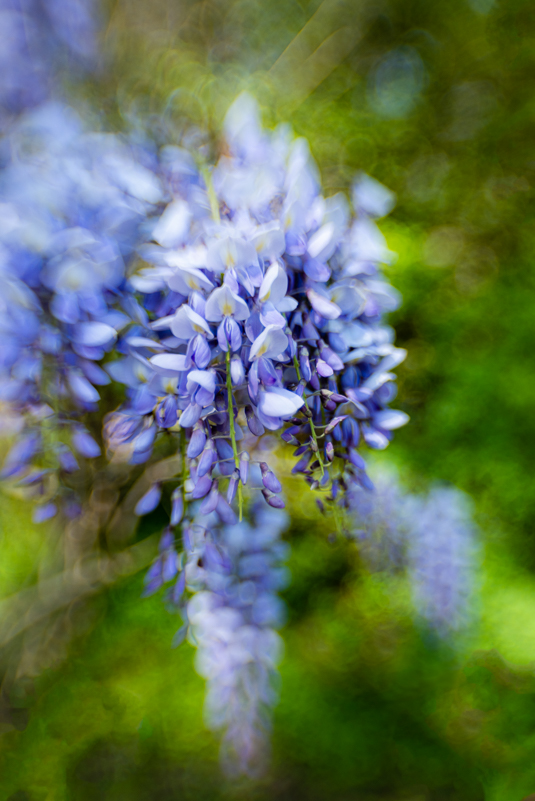
Elegant draping of wisteria enhanced with use of the Lensbaby Velvet 56 and wider aperture for softer focus.

Getting in close to dahlia petals and shining a flashlight from behind created a magical image. In post I used the Mixer Brush to enhance the petal flow.
SIMPLE STEPS AND A BLISSFUL SIGH
Whatever I’m photographing, I follow these steps: Notice, Define, Connect, Compose, Focus, Light and Simplify. I stay longer, look for more and refine until I let out a blissful sigh and smile. Wherever you find yourself, in or out of gardens, with or without flowers, these ideas work with just any subject. I encourage you to give them a try and see what happens. IHere’s wishing you many blissful sighs and smiles.
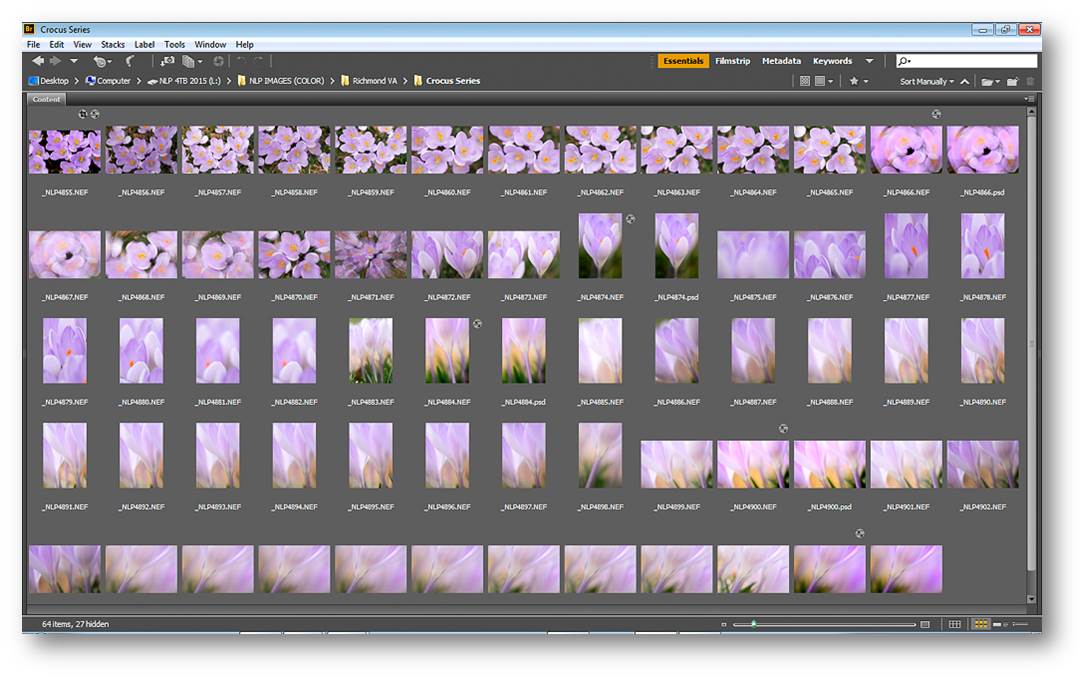
Here is an example of what I’m talking about when I say stay longer and work your subject. This session lasted for 64 frames. It wasn’t until Frame 54 that I saw what has become my favorite composition in the series. And it was Frame 63 that worked best for me. I would never have seen the image if I left after two or three frames.

And here is FRAME 63 of the crocus series shown above. I hope this resonates with you and causes you stay longer with your subjects and ask, “Is there more?”

This tulip interpretation was created in post by adding a radial blur.
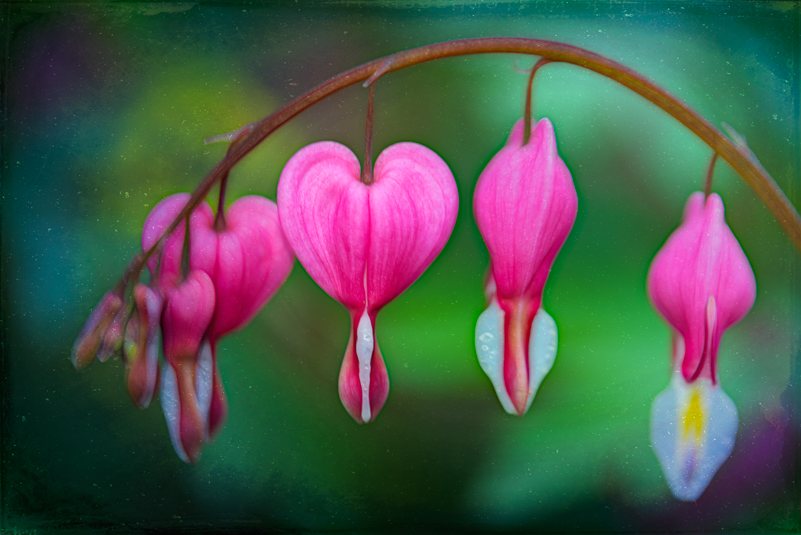
Bleeding Hearts from Agecroft Hall interpreted on the dark side to bring out the flowers.
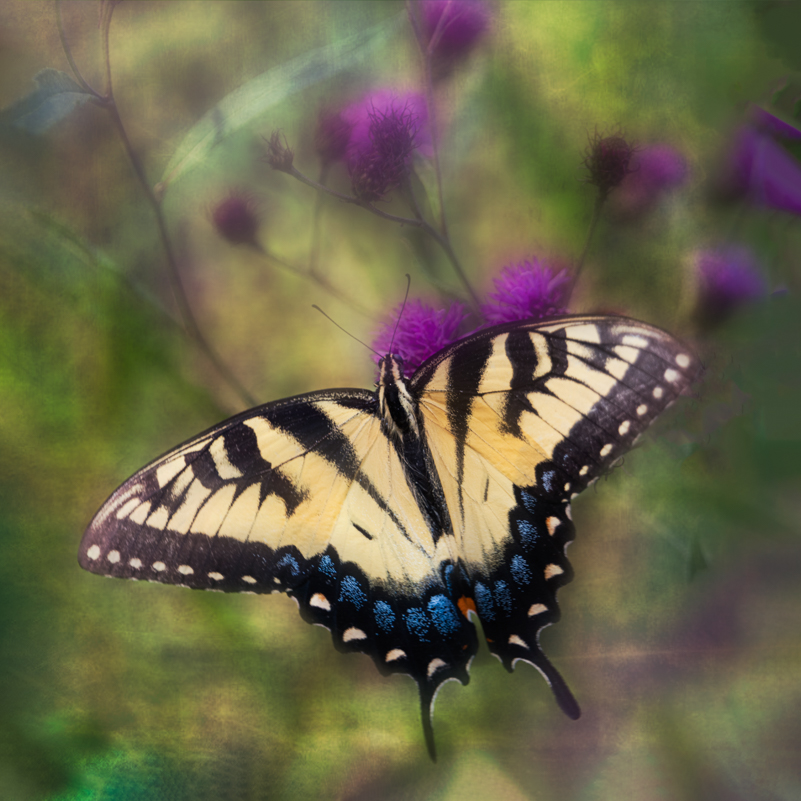
Butterflies are free to fly, and so are we when we interpret our images. This was refined in post with a square crop, adding canvas on bottom to give butterfly some breathing room and finalized with a Topaz texture with masking to bring out “The Star”.


